Setting up GitLab Runner
Installing GitLab Runner
To ensure that each server can efficiently perform build and deployment tasks, we will install GitLab Runner on both the Development Server and Build Server.
Install GitLab Runner using the following commands:
apt update -y

curl -L "https://packages.gitlab.com/install/repositories/runner/gitlab-runner/script.deb.sh" | sudo bash

apt install gitlab-runner
Previously, we discussed the different types of GitLab Runners and how they fit into the project’s needs in Section 1.3. When deploying, you can choose the strategy that best suits your project’s characteristics.
In this workshop, we will focus on deploying a Group Runner, a flexible and powerful option that allows all projects within the group to be handled by the same Runner. This helps optimize resources and ensures consistency in the CI/CD process.

GitLab Runner has been successfully installed on both servers.
Configuring GitLab Runner
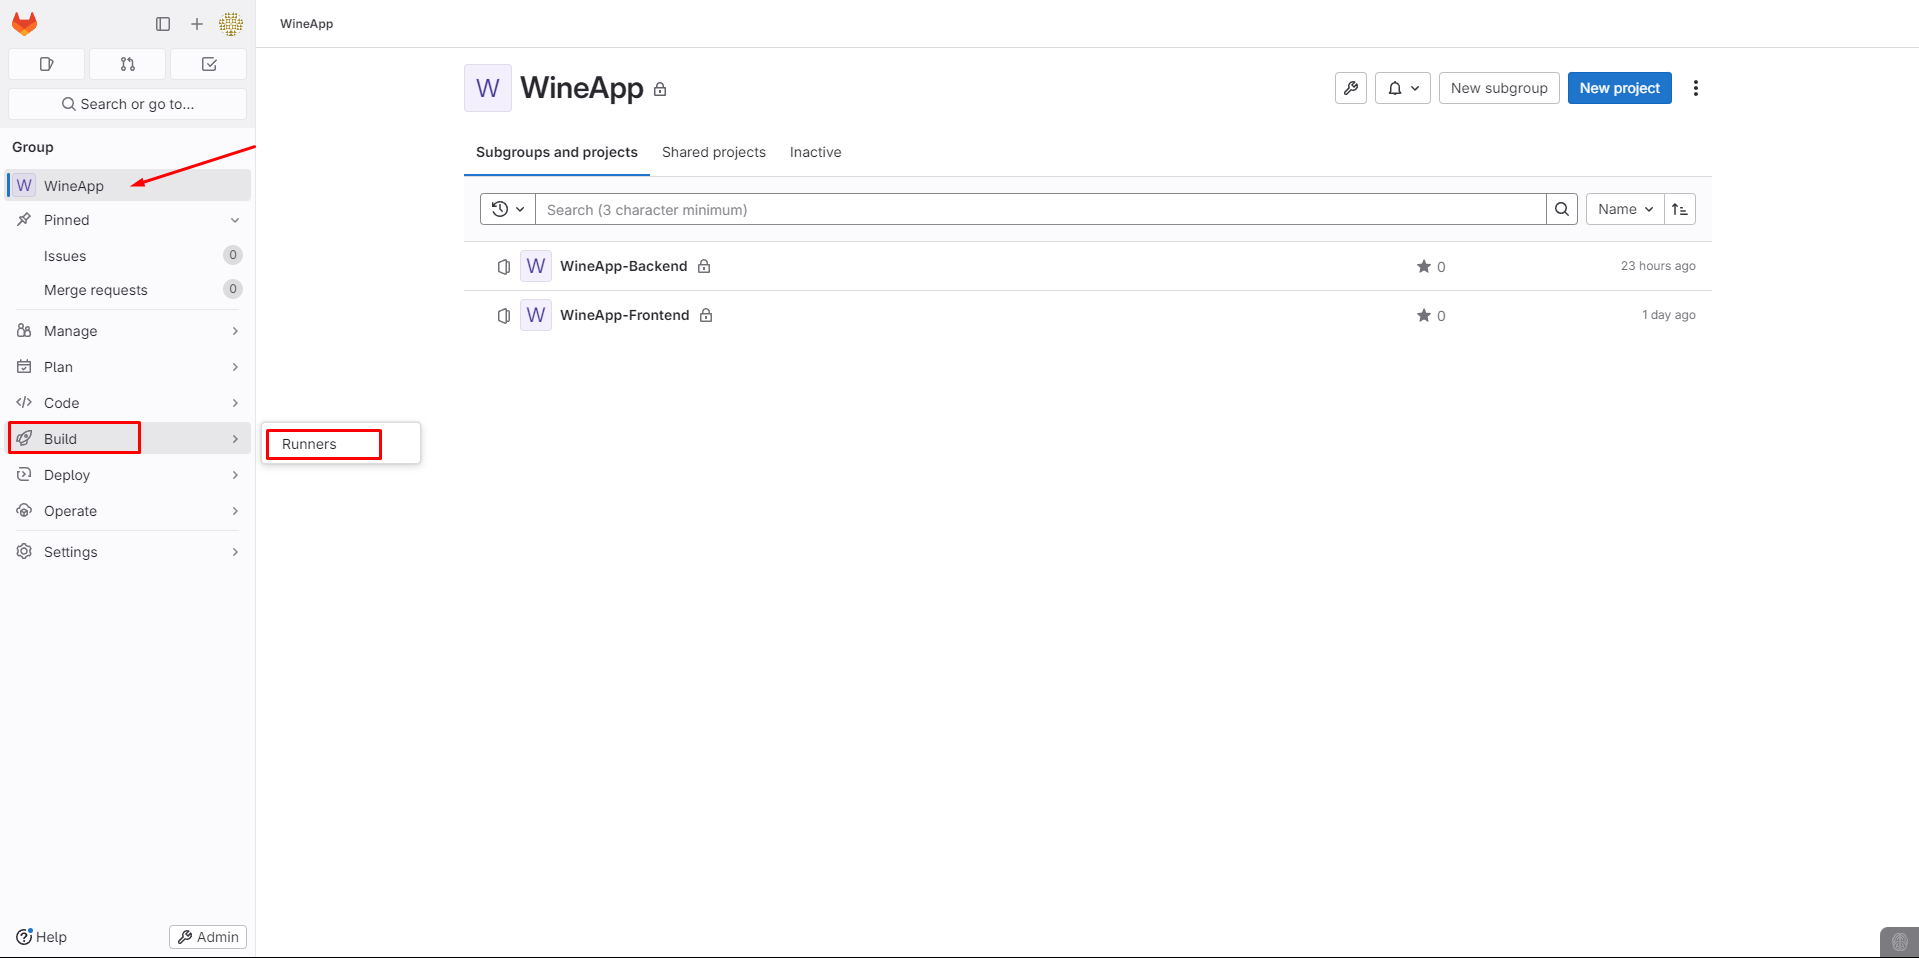
Navigate to Groups -> Build -> Runners.
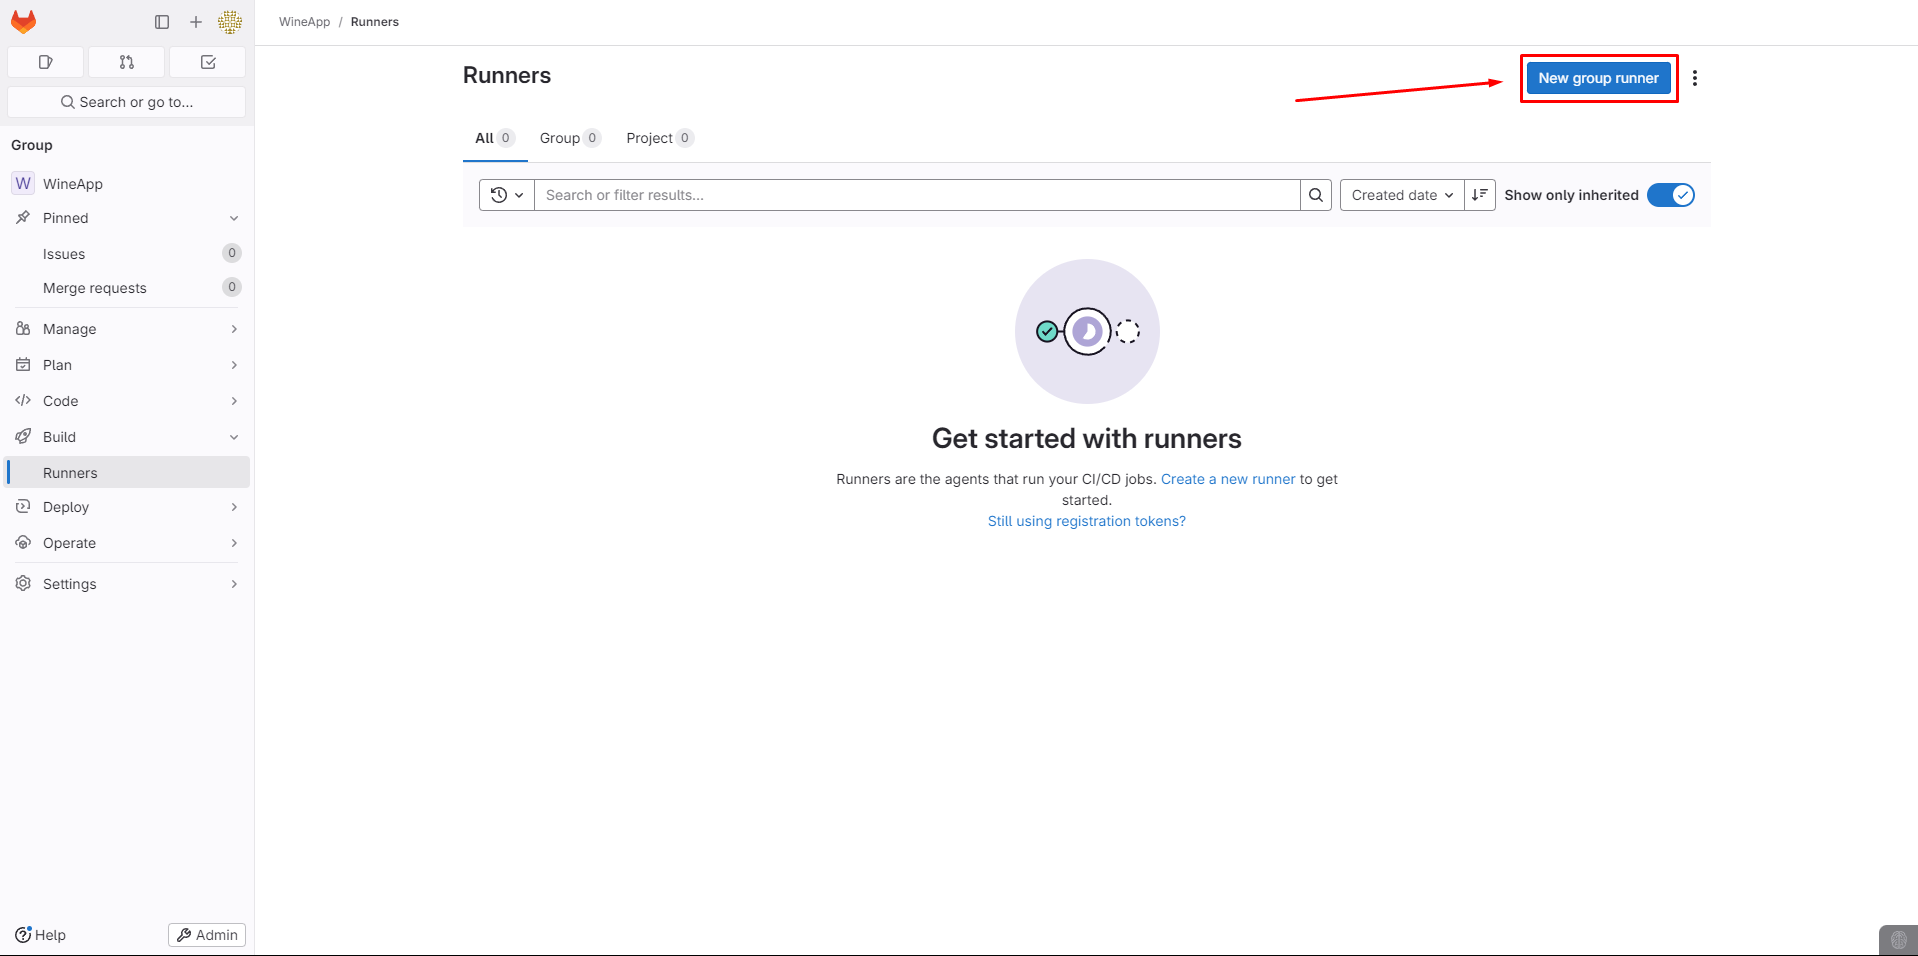
Select New group runner.
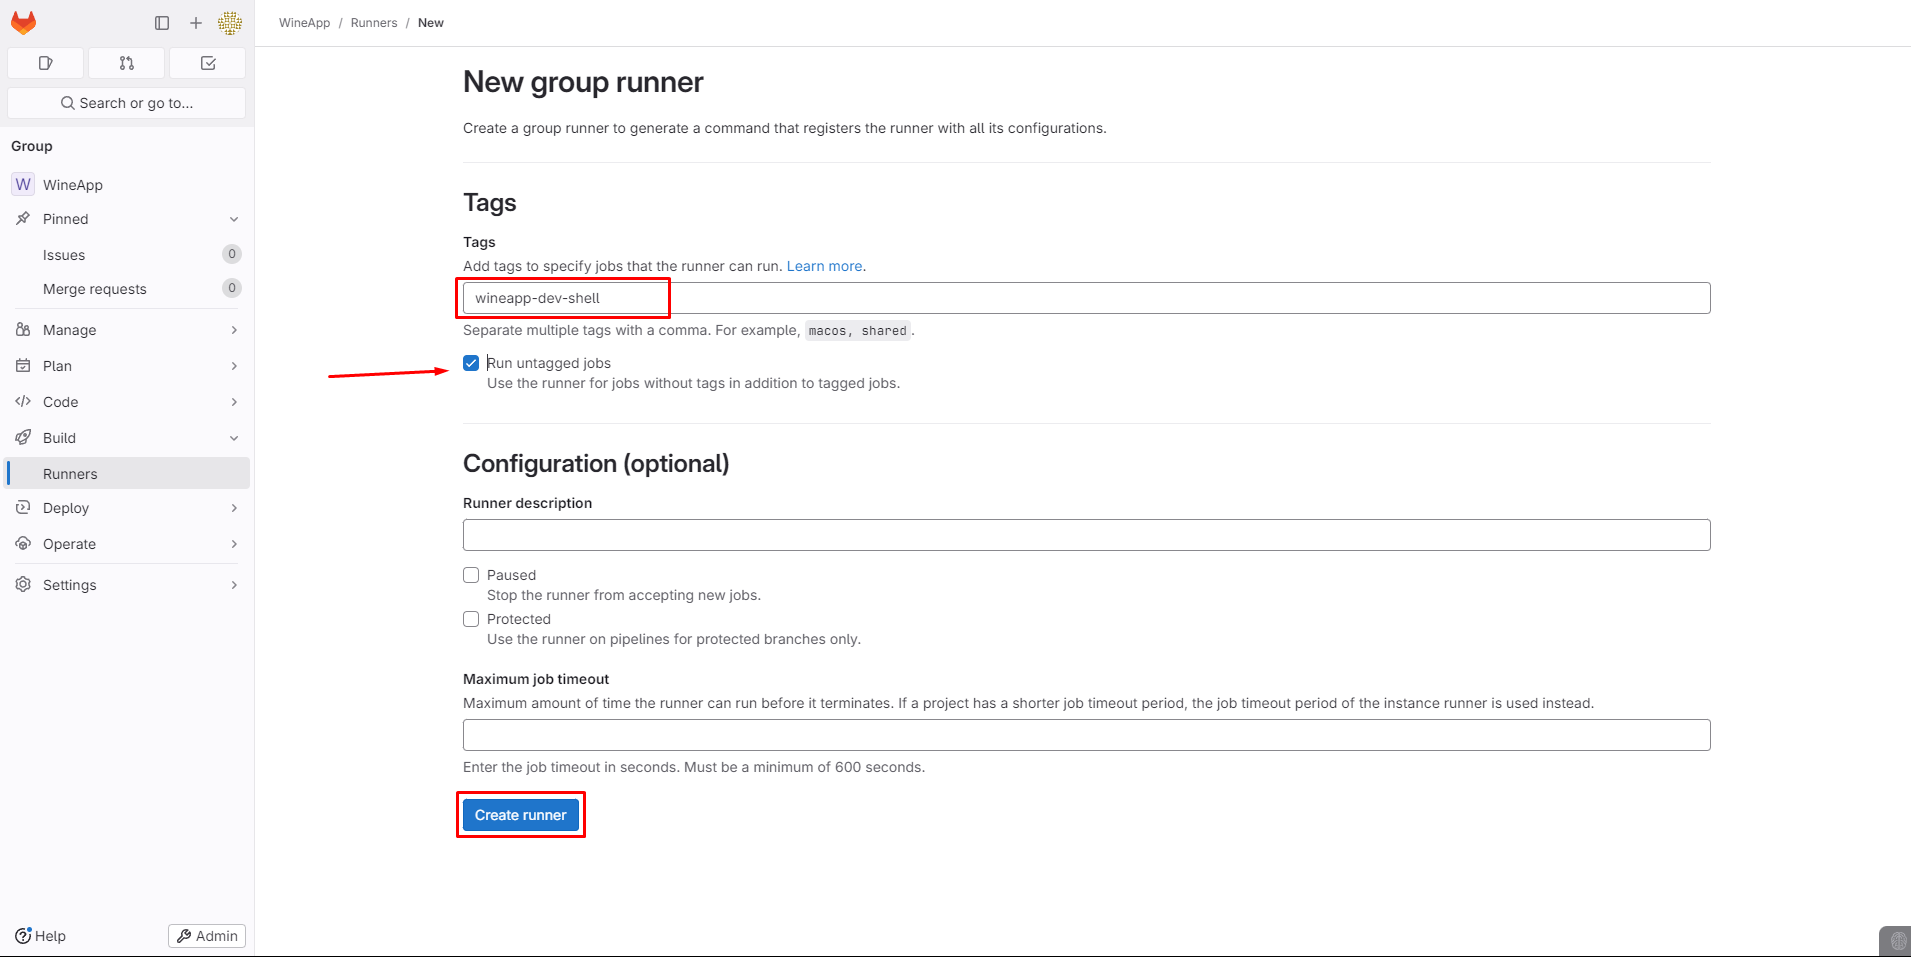
Set Tags and Create the Runner, ensuring to tick the Run untagged jobs option.
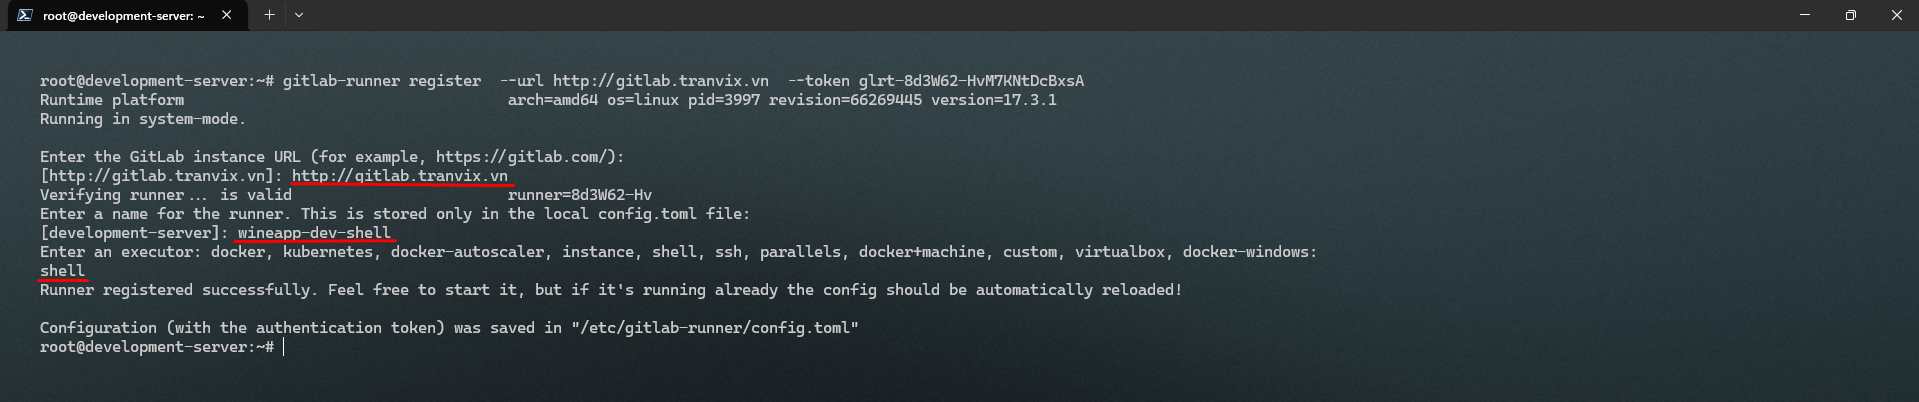
GitLab will then guide us on how to register the GitLab-Runner with the virtual machine:
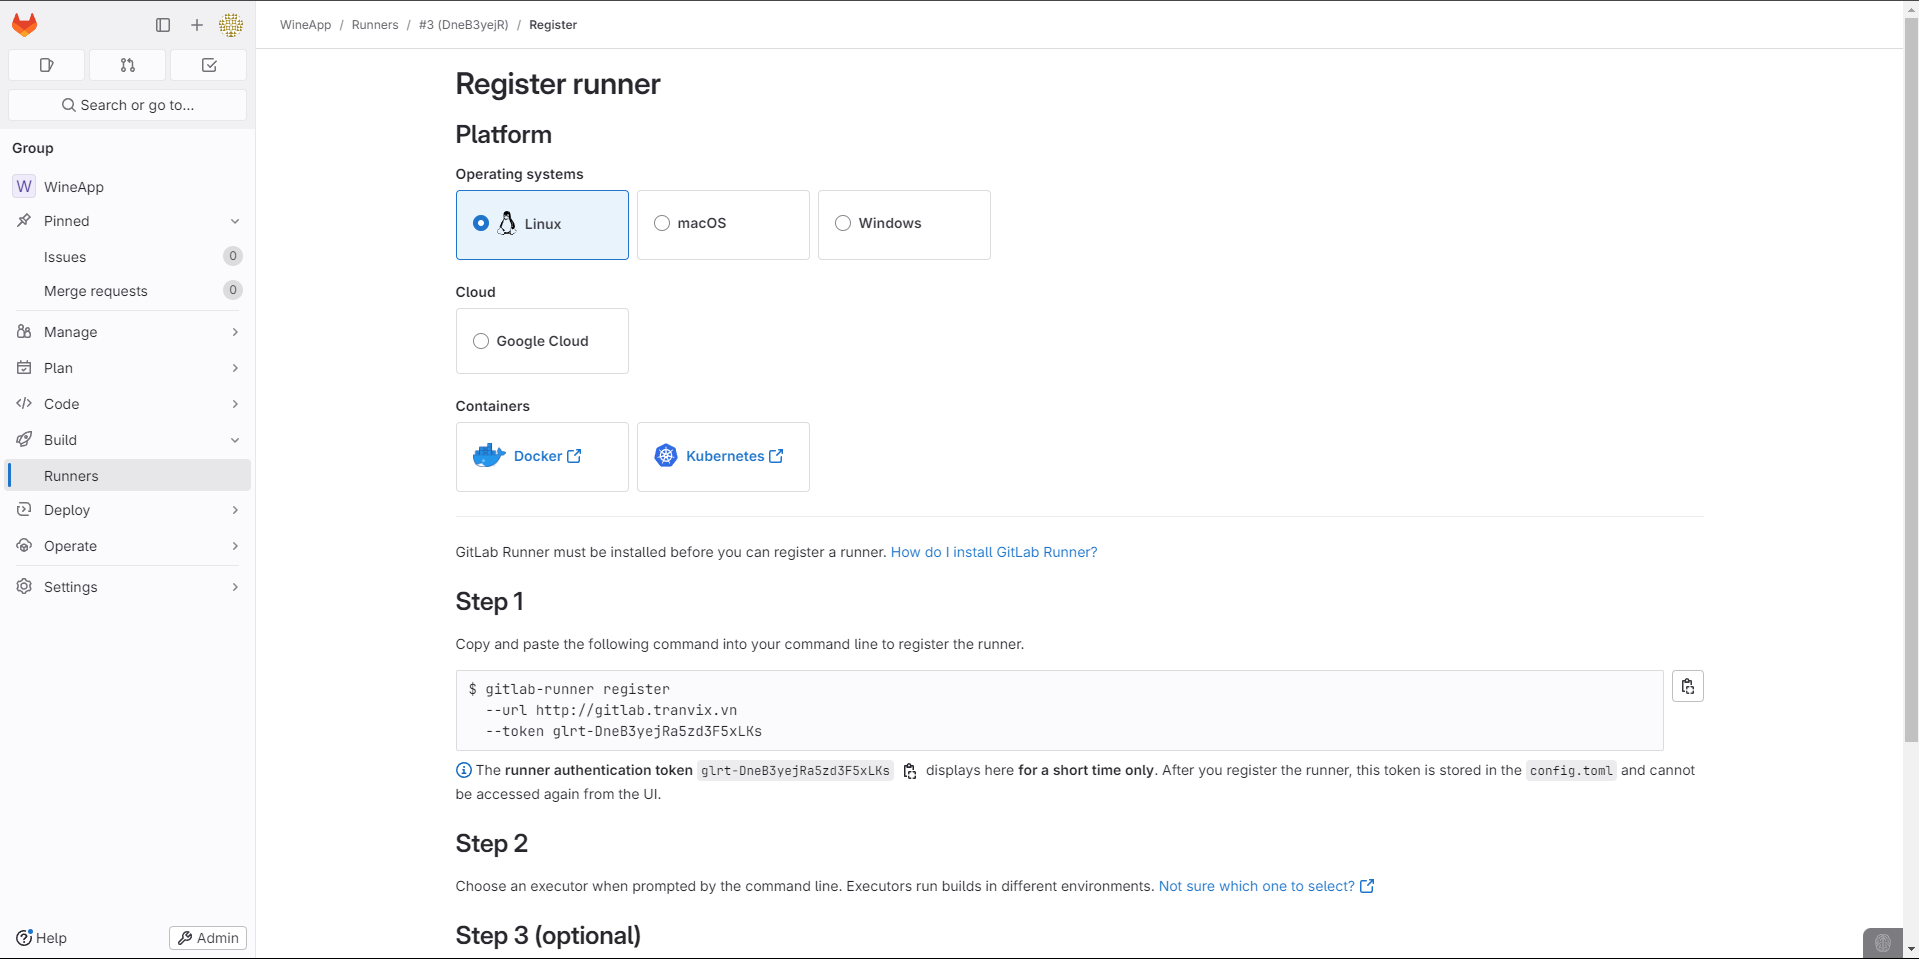
Execute Step 1:
gitlab-runner register --url http://gitlab.tranvix.vn --token glrt-DneB3yejRa5zd3F5xLKs
After successfully registering on both servers, check in GitLab.
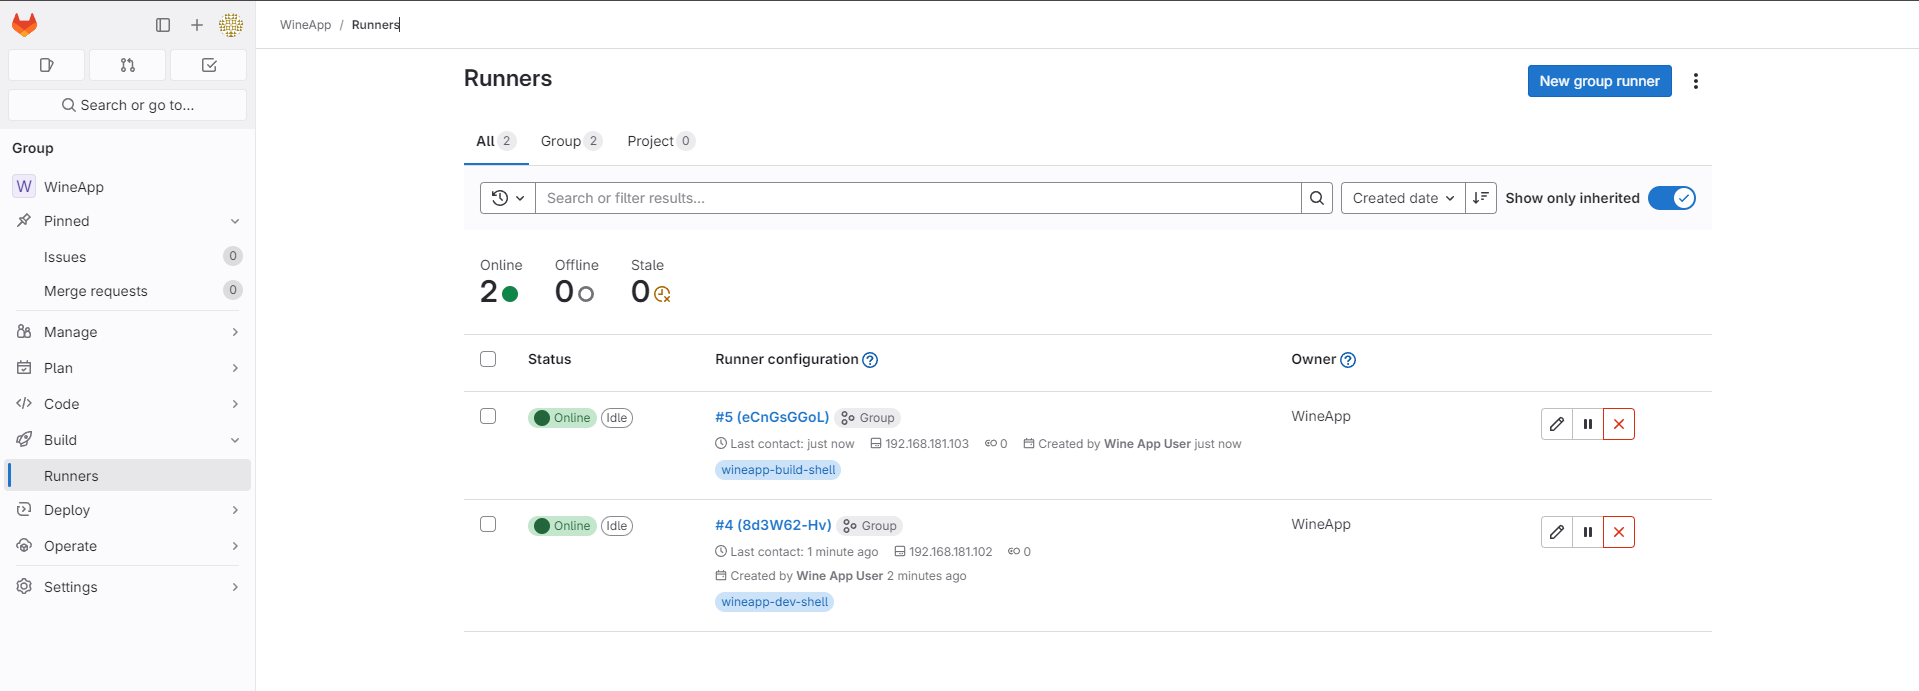
GitLab has now been successfully set up.