Build and Push Docker Image
Setting Up Necessary Configurations
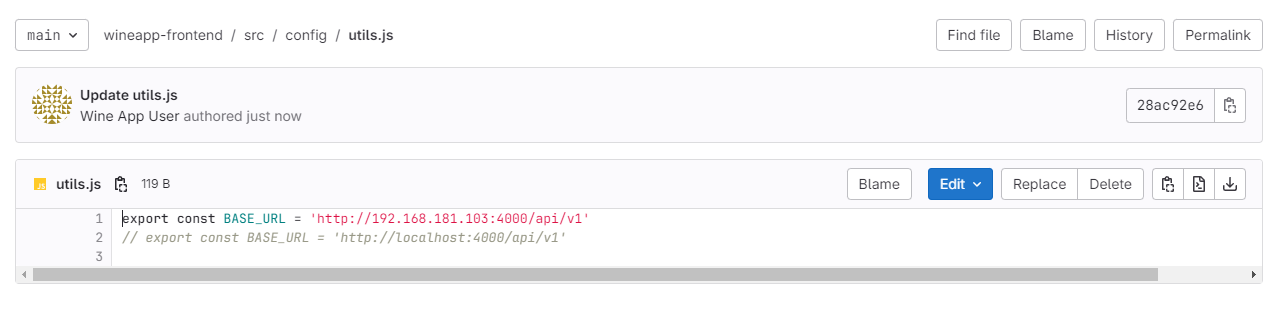
Before creating the Dockerfile, you need to update the BASE_URL in the frontend configuration to point to the backend server where you will deploy. Specifically, you need to change this value in the frontend configuration file.
To do this on GitLab, follow these steps:
- Navigate to the configuration file:
In your frontend project on GitLab, go to
src/config/utils.js.Change the value of
BASE_URLto point to the current backend server.
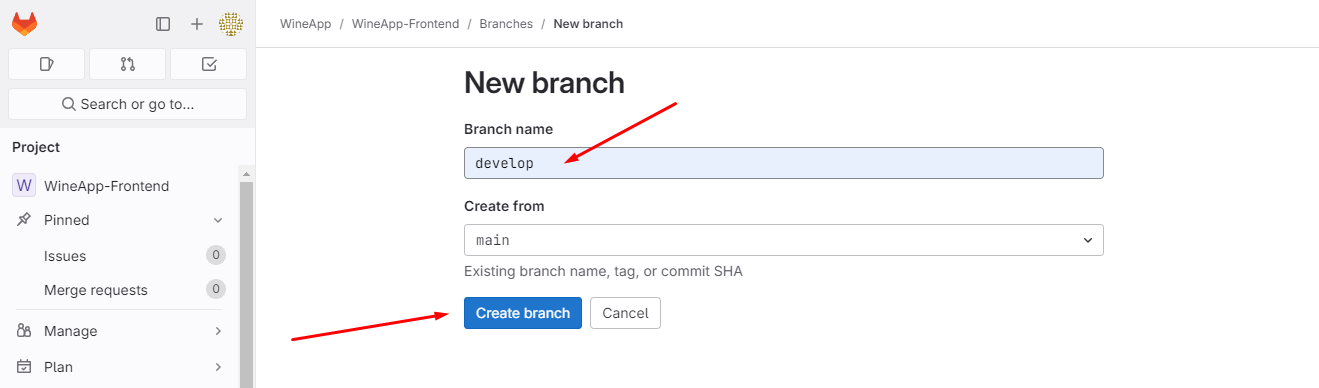
Next, we will create a new branch.
To ensure the stability of the Main branch, create a new branch for making changes. This keeps the Main branch unaffected during development.
- Go to the + icon and select New Branch.
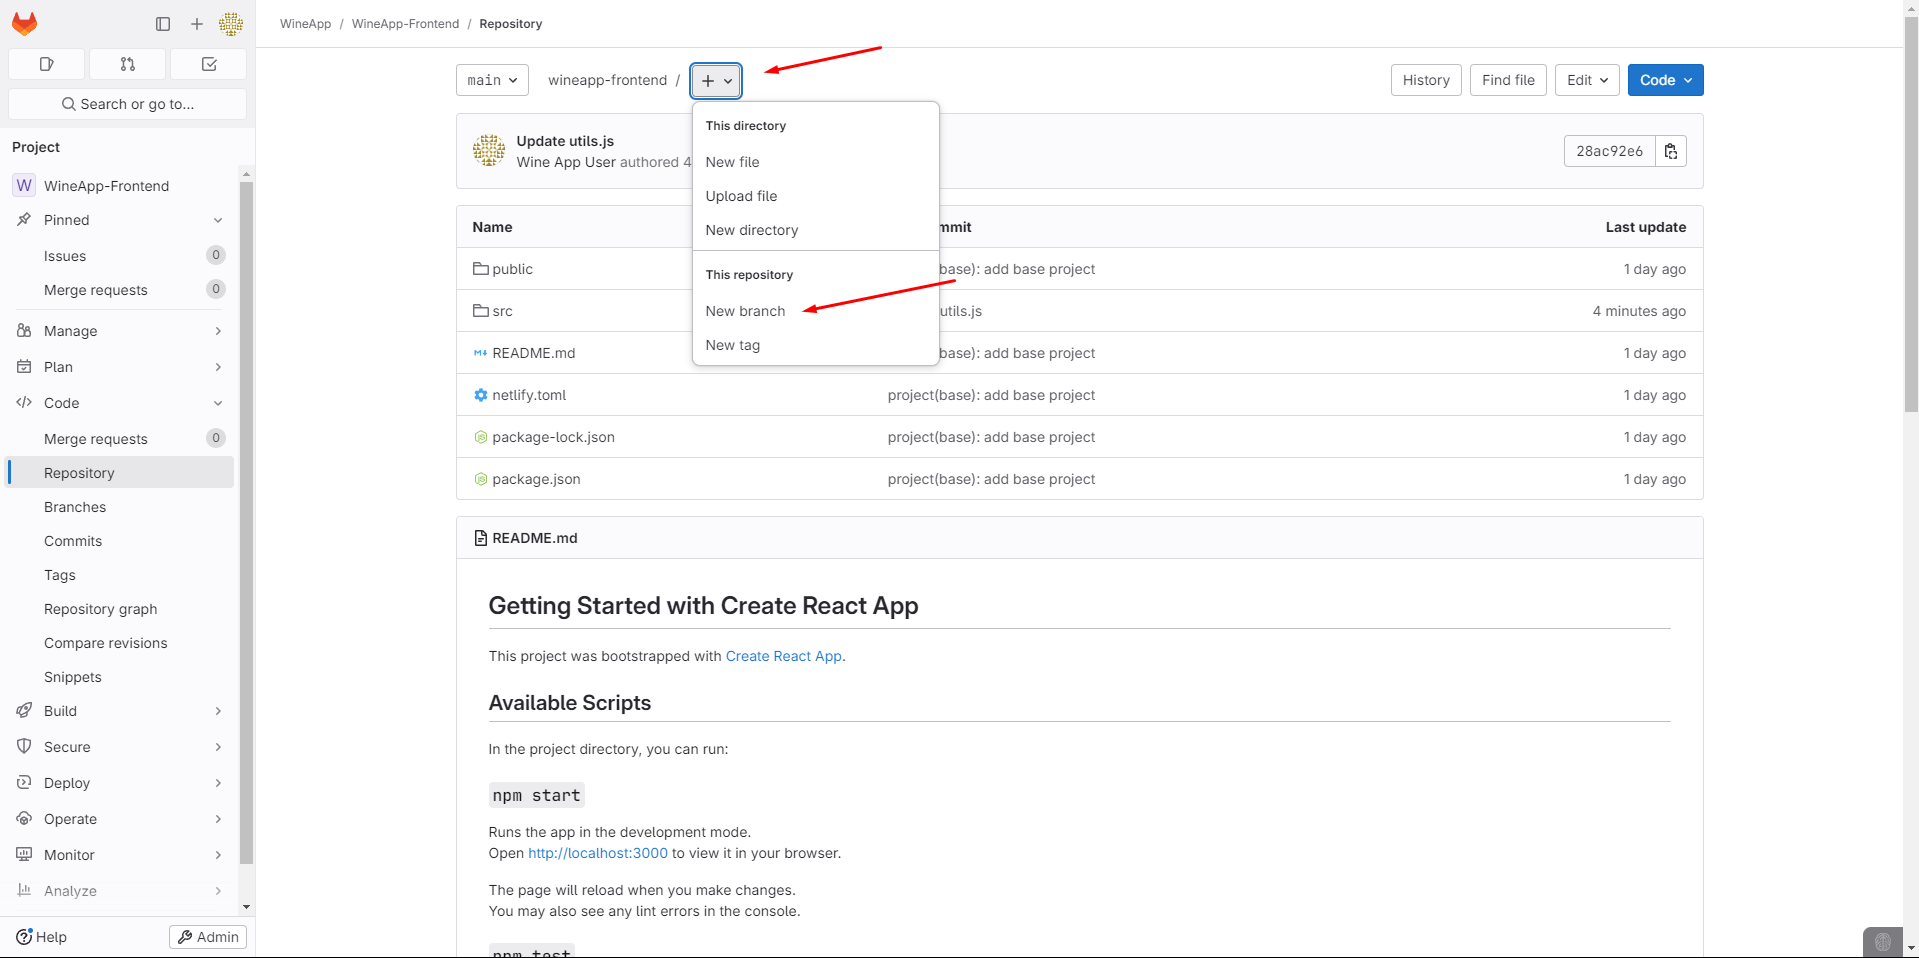
We will name and create the branch.
We will also adjust some settings to enhance security.
- Navigate to Settings -> Repository.
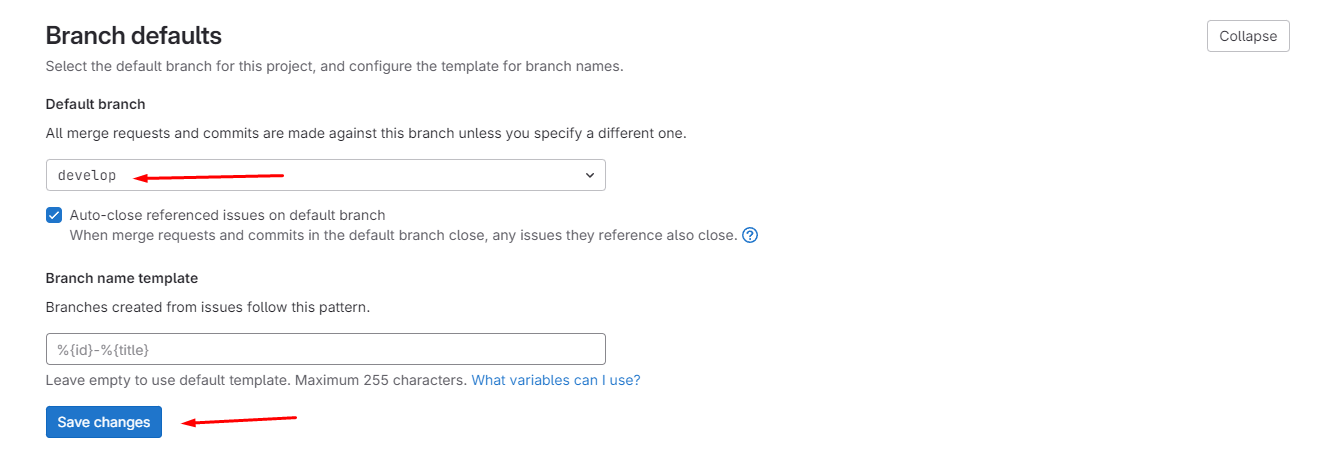
Change the default branch to the newly created one so that when you access the project, the source code of the Develop branch appears first.

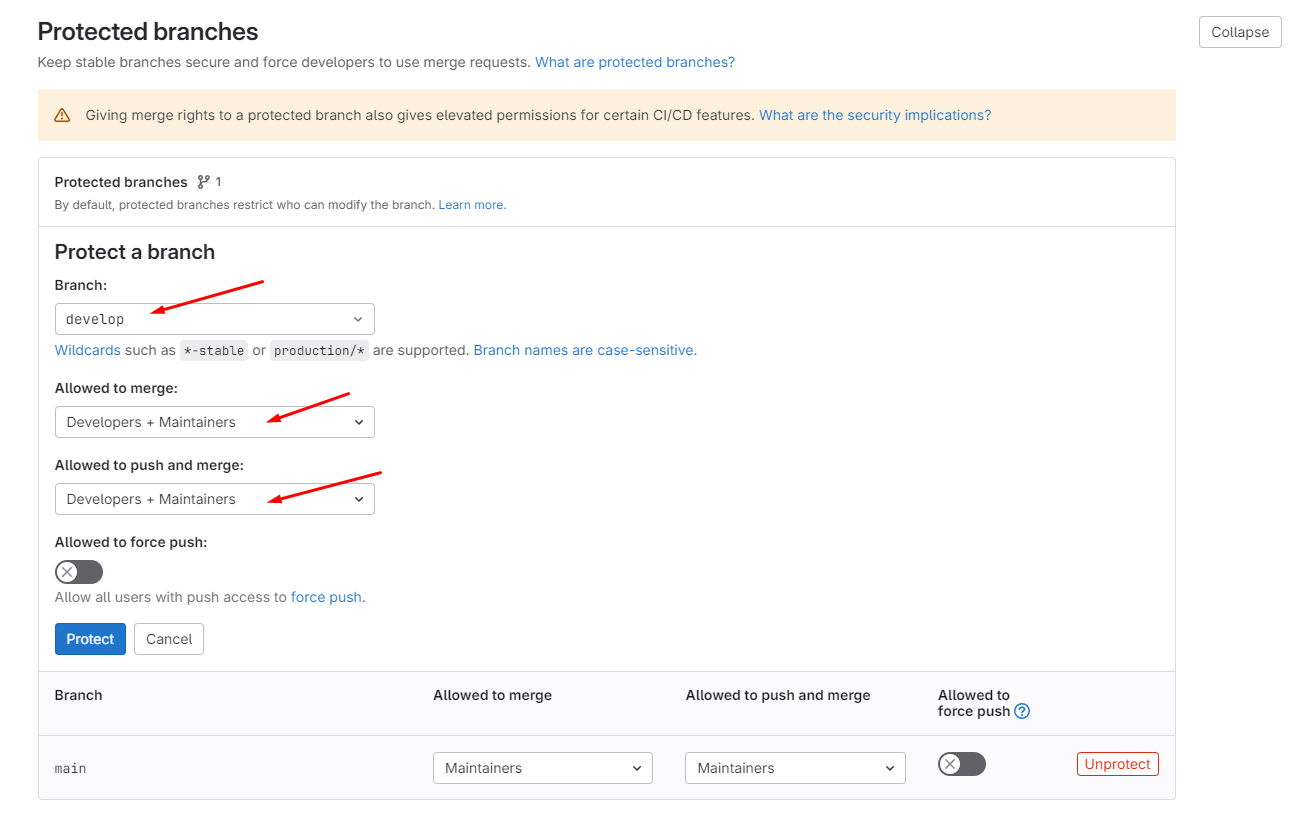
Next, we will protect the branch. Protecting a branch helps safeguard it from unauthorized Push and Merge actions.
Add GitLab-Runner User to Docker Group
During the pipeline execution, the gitlab-runner user will be used to run the project.
Adding gitlab-runner to the Docker group allows the user to execute Docker commands like Login, Logout, Build, and Push Image.
sudo usermod -aG docker gitlab-runner
Create Dockerfile
Access the Web IDE for easier interaction.
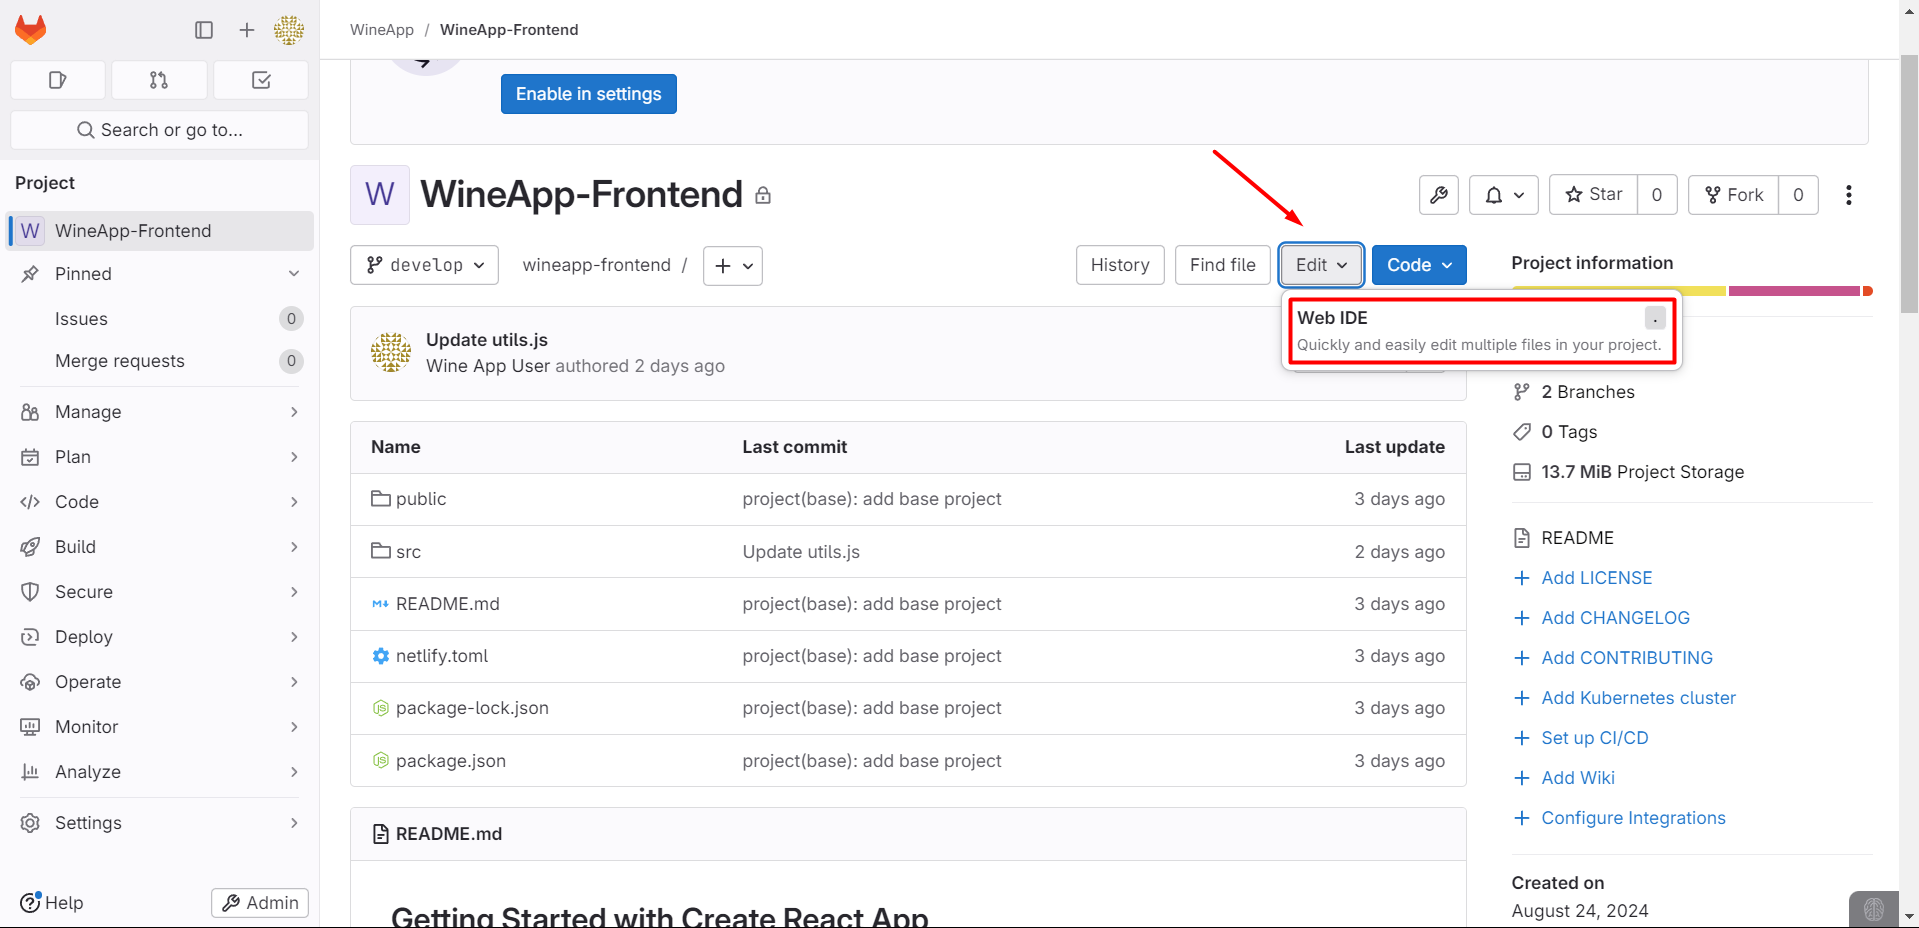
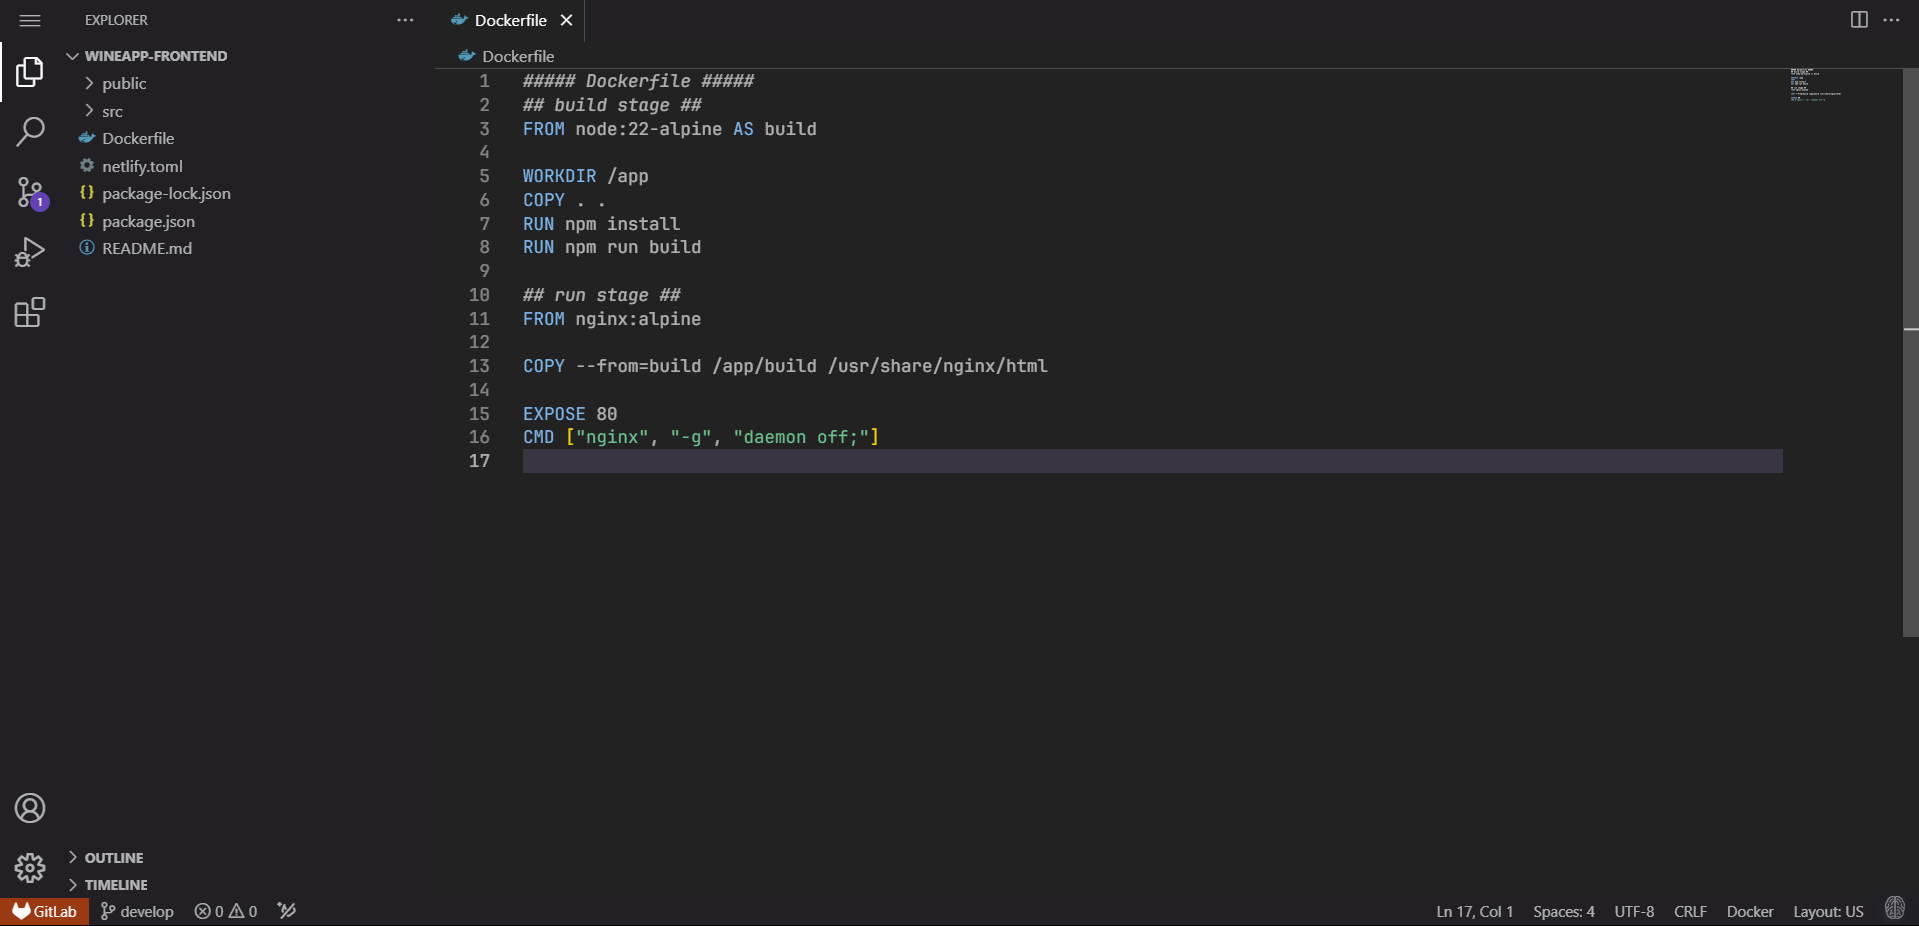
Create the Dockerfile for the Frontend:
##### Dockerfile #####
## build stage ##
FROM node:22-alpine AS build

WORKDIR /app
COPY . .
RUN npm install
RUN npm run build

## run stage ##
FROM nginx:alpine

COPY --from=build /app/build /usr/share/nginx/html

EXPOSE 80
CMD ["nginx", "-g", "daemon off;"]
Create GitLab CI/CD
We will create a .gitlab-ci.yml file.
The .gitlab-ci.yml file is a configuration file used in GitLab CI/CD. It defines pipelines, jobs, and stages to automate tasks like building, testing, and deploying code when changes are made in the repository.
variables:
    PROJECT_USER: "wineapp"
    IMAGE_VERSION: "${PORTUS_URL}/${PROJECT_USER}/${CI_PROJECT_NAME}:${CI_COMMIT_TAG}_${CI_COMMIT_SHORT_SHA}"

stages:
    - build
    - push

build:
    stage: build
    variables:
        GIT_STRATEGY: clone
    before_script:
        - docker login -u ${PORTUS_USER} -p ${PORTUS_PASSWORD} ${PORTUS_URL}
    script:
        - docker build -t ${IMAGE_VERSION} .
    after_script:
        - docker logout ${PORTUS_URL}
    tags:
        - wineapp-build-shell
    only:
        - tags

push:
    stage: push
    variables:
        GIT_STRATEGY: none
    before_script:
        - docker login -u ${PORTUS_USER} -p ${PORTUS_PASSWORD} ${PORTUS_URL}
    script:
        - docker push ${IMAGE_VERSION}
    after_script:
        - docker logout ${PORTUS_URL}
    tags:
        - wineapp-build-shell
    only:
        - tags
The GitLab CI/CD configuration file is written in YAML.
Before explaining the configuration file in detail, let’s explore Variables in GitLab CI/CD.
There are two main types of variables:
Predefined Variables:
Automatically provided by GitLab in each pipeline.
Examples:
- CI_COMMIT_SHA: SHA of the current commit.
- CI_JOB_ID: ID of the current job.
- CI_PROJECT_NAME: Name of the project.
- CI_COMMIT_REF_NAME: Branch or tag name of the current commit.
- CI_PIPELINE_ID: ID of the pipeline.
User-defined Variables:
These are defined by the user in the
.gitlab-ci.ymlfile or in the project’s settings on GitLab.Defined in
.gitlab-ci.yml:variables: PROJECT_USER: "wineapp" PORTUS_URL: "https://registry.example.com"Defined in the project settings under
Project Settings > CI/CD > Variables:Can be set at the project, group, or specific pipeline level.
Supports features such as protected, masked, and scoped (allowing variables to be limited to certain environments or branches).
In the project, the following variables are defined first:
PROJECT_USER: Used to define the user for deploying the project.
IMAGE_VERSION: Creates a tag for the Docker image using the following variables:
${PORTUS_URL}: The URL of the Docker registry (could be Portus).${PROJECT_USER}: The user under which the image will be stored.${CI_PROJECT_NAME}: The name of the project.${CI_COMMIT_TAG}: The tag associated with the commit (could be a version number).${CI_COMMIT_SHORT_SHA}: The short version of the commit SHA.
You can retrieve the value of a variable using ${<Variable>}.
Next, we will create the Stages for the Pipeline:
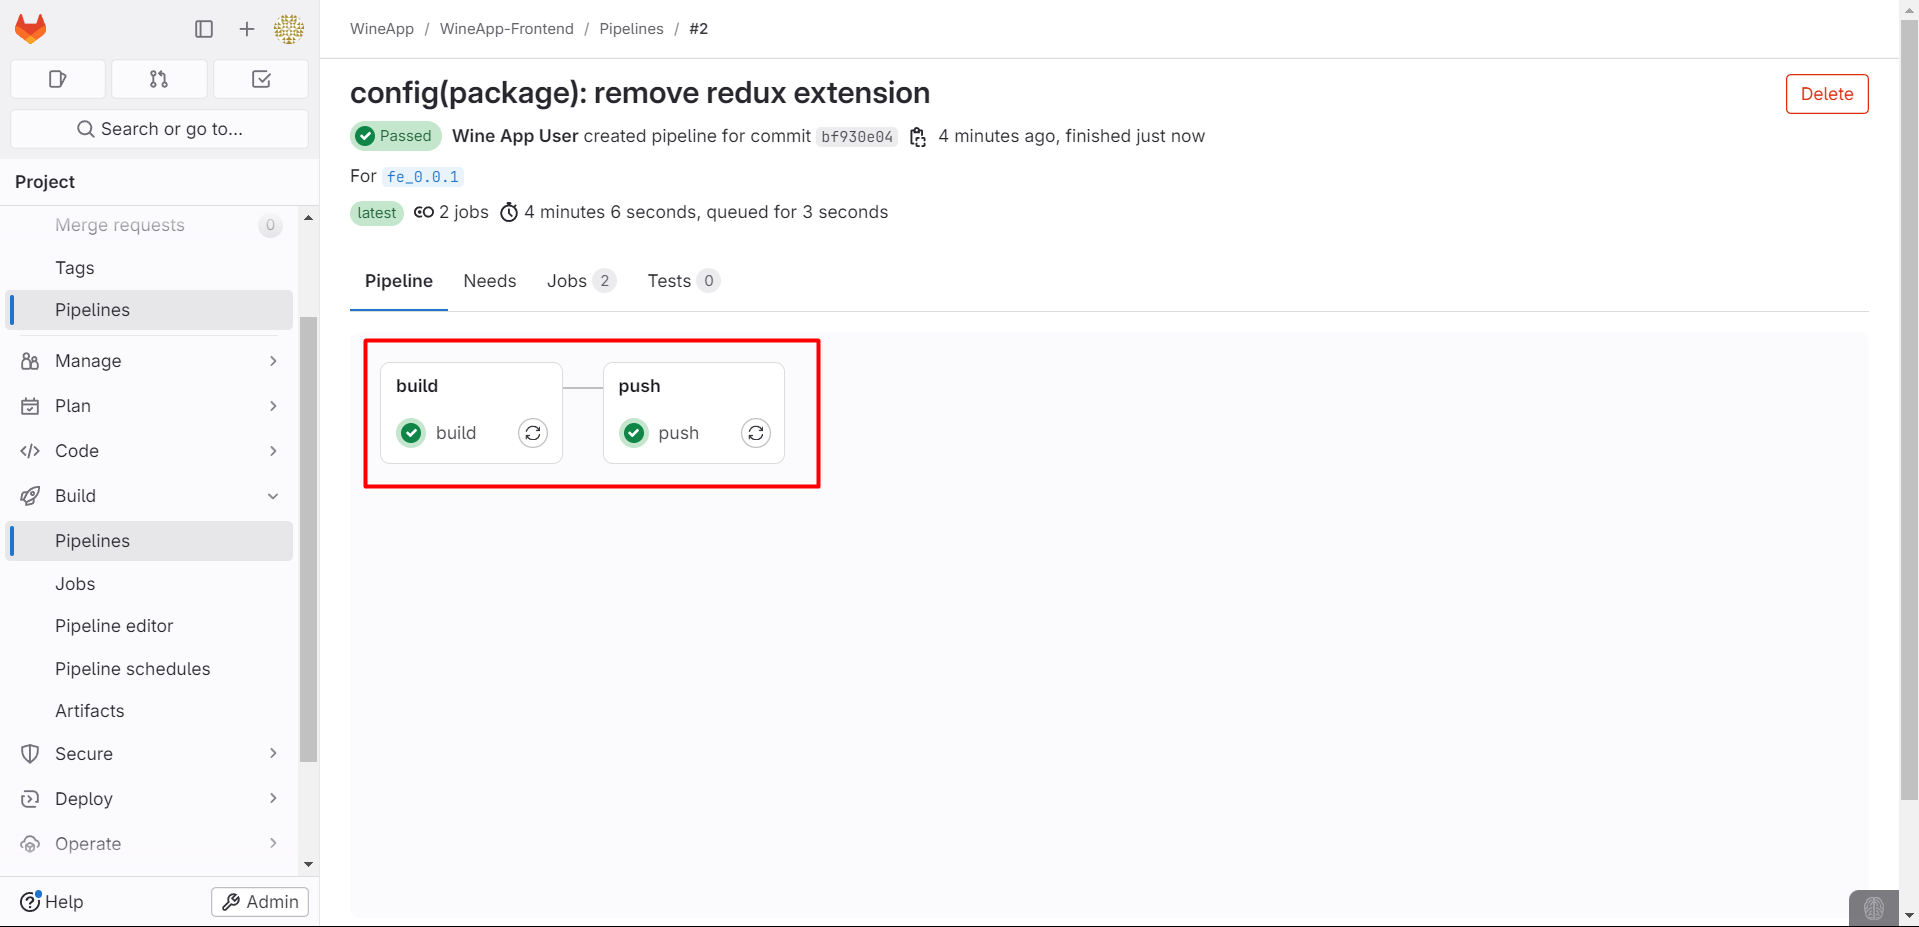
The pipeline will be defined with two main stages: build and push.
build: The stage where the Docker image is built.
push: The stage where the built Docker image is pushed to the Docker registry.
For the Build Stage, the following steps will be executed:
GIT_STRATEGY: clone: Specifies that the repository will be cloned (this is the default behavior).before_script: Commands executed before the main script. This logs into the Docker registry using credentials stored in the${PORTUS_USER}and${PORTUS_PASSWORD}environment variables.script: The main part of this stage, building the Docker image with theIMAGE_VERSIONtag.after_script: Logs out from the Docker registry after the build process is completed.tags: Specifies the runner (wineapp-build-shell) to be used for this job.only: Ensures this job only runs when a Git Tag is pushed.
Normally, when the code changes, GitLab CI/CD will start the pipeline. However, when specifying only: -tags, the pipeline will run only when a Tag is created.
For the Push Stage, it is similar to the Build Stage with a few differences:
GIT_STRATEGY : none: No need to clone the source code again at this stage, as it was cloned in the previous stage.script: Pushes the built Docker image to the Docker registry.
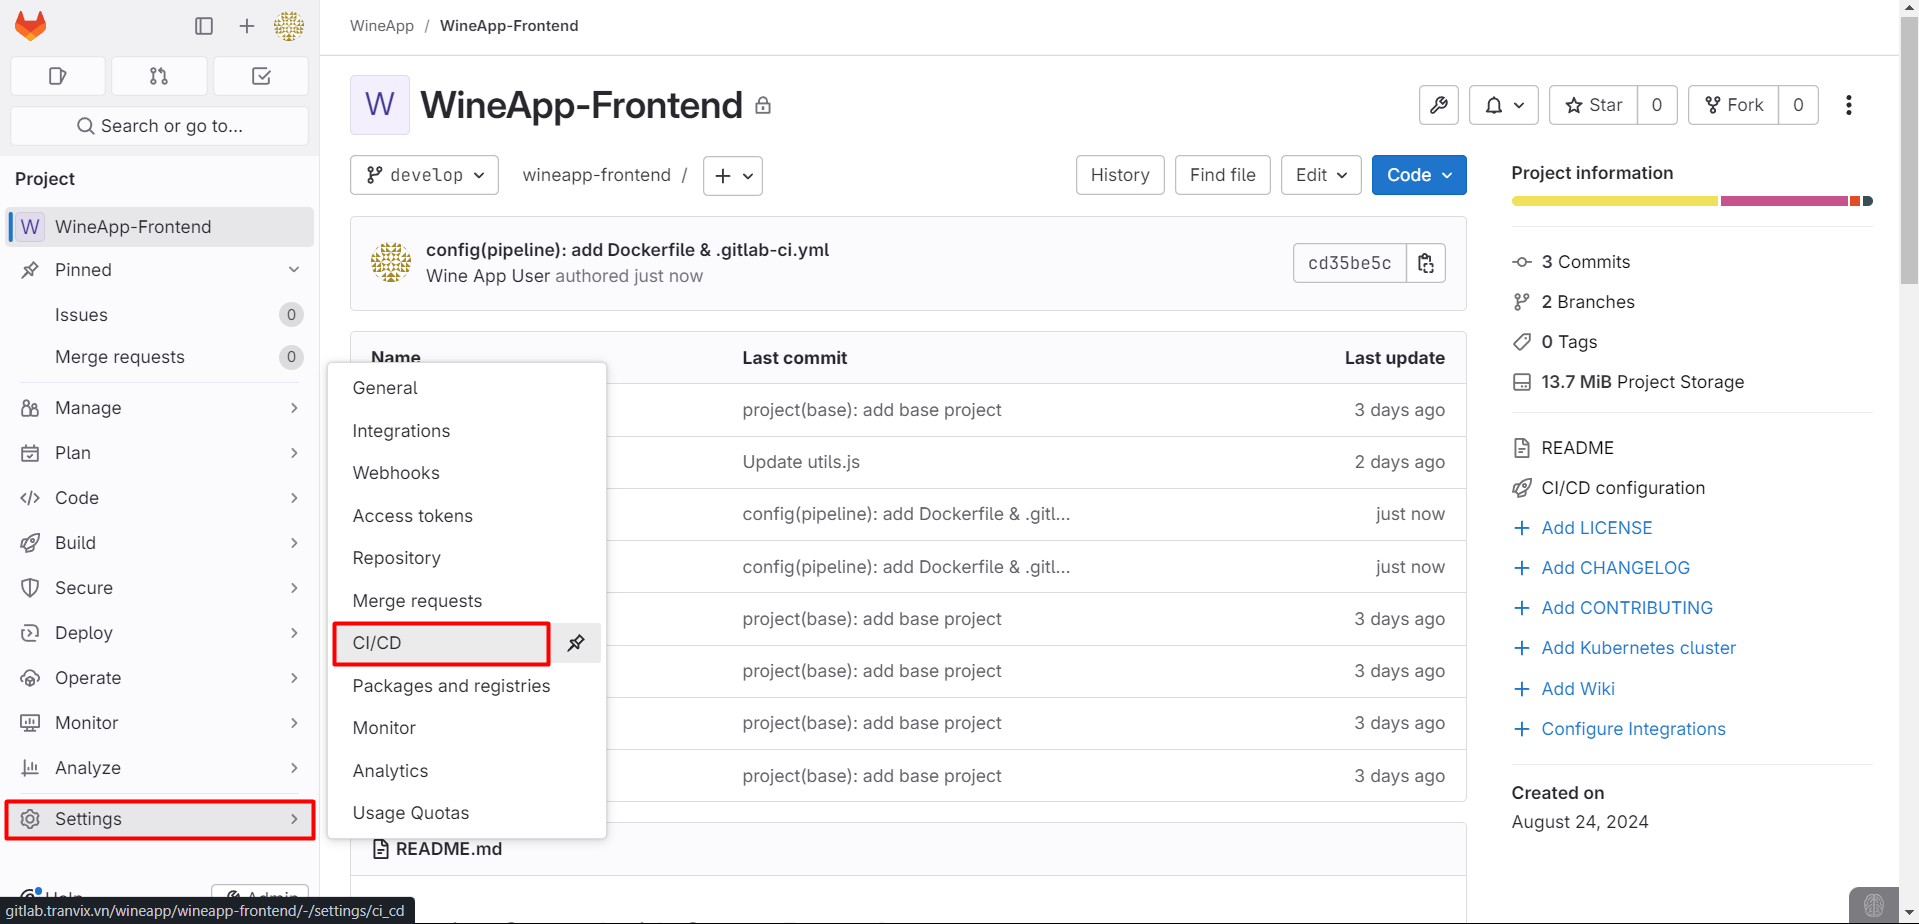
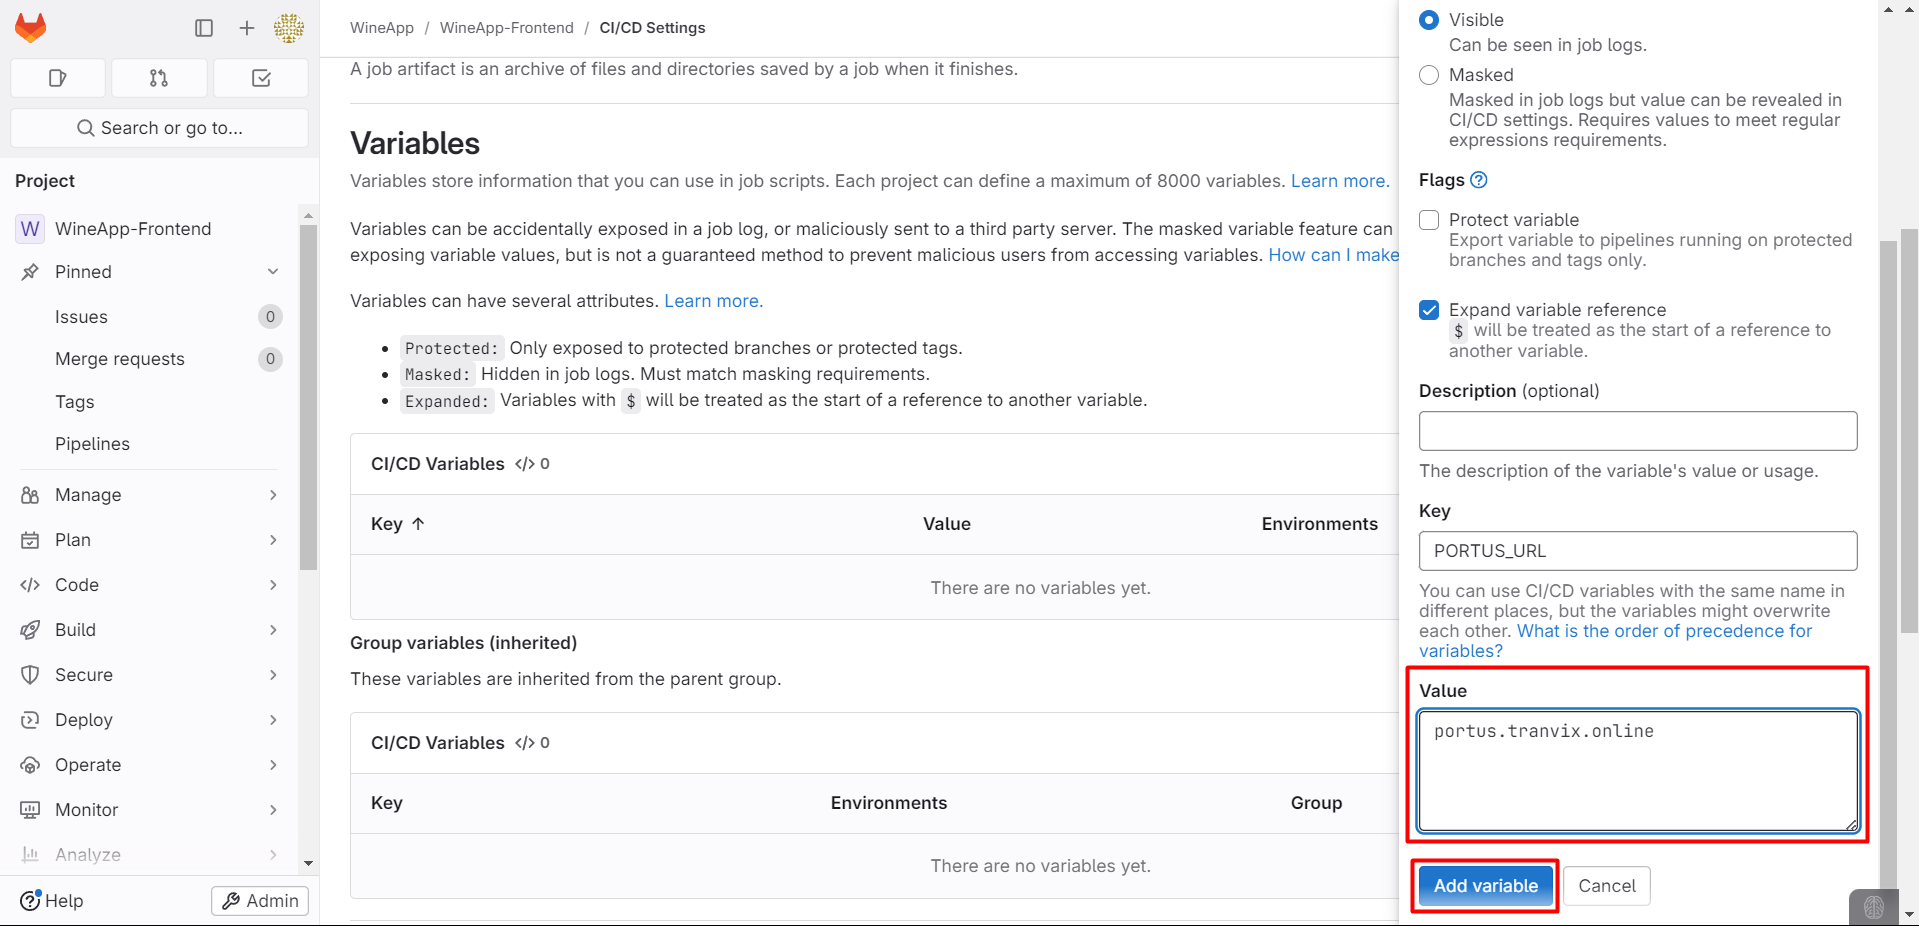
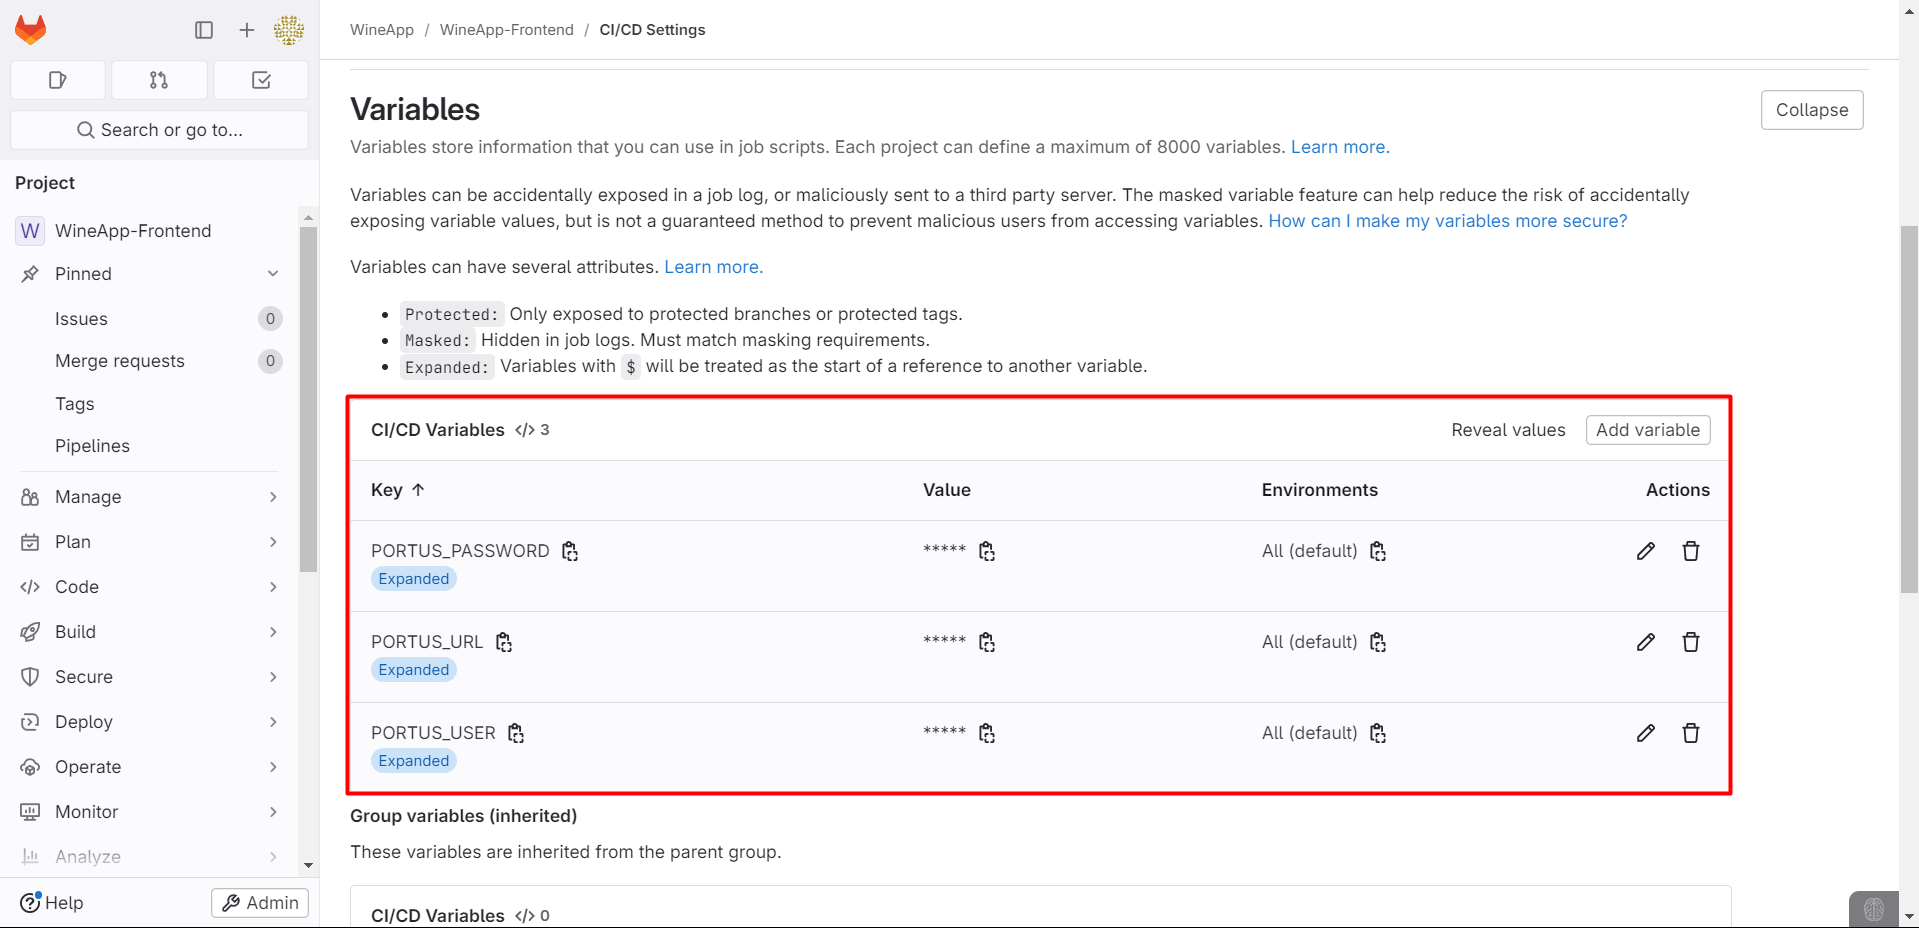
Create Variables
After creating the .gitlab-ci.yml file, commit it and add variables by accessing Project Settings > CI/CD > Variables:
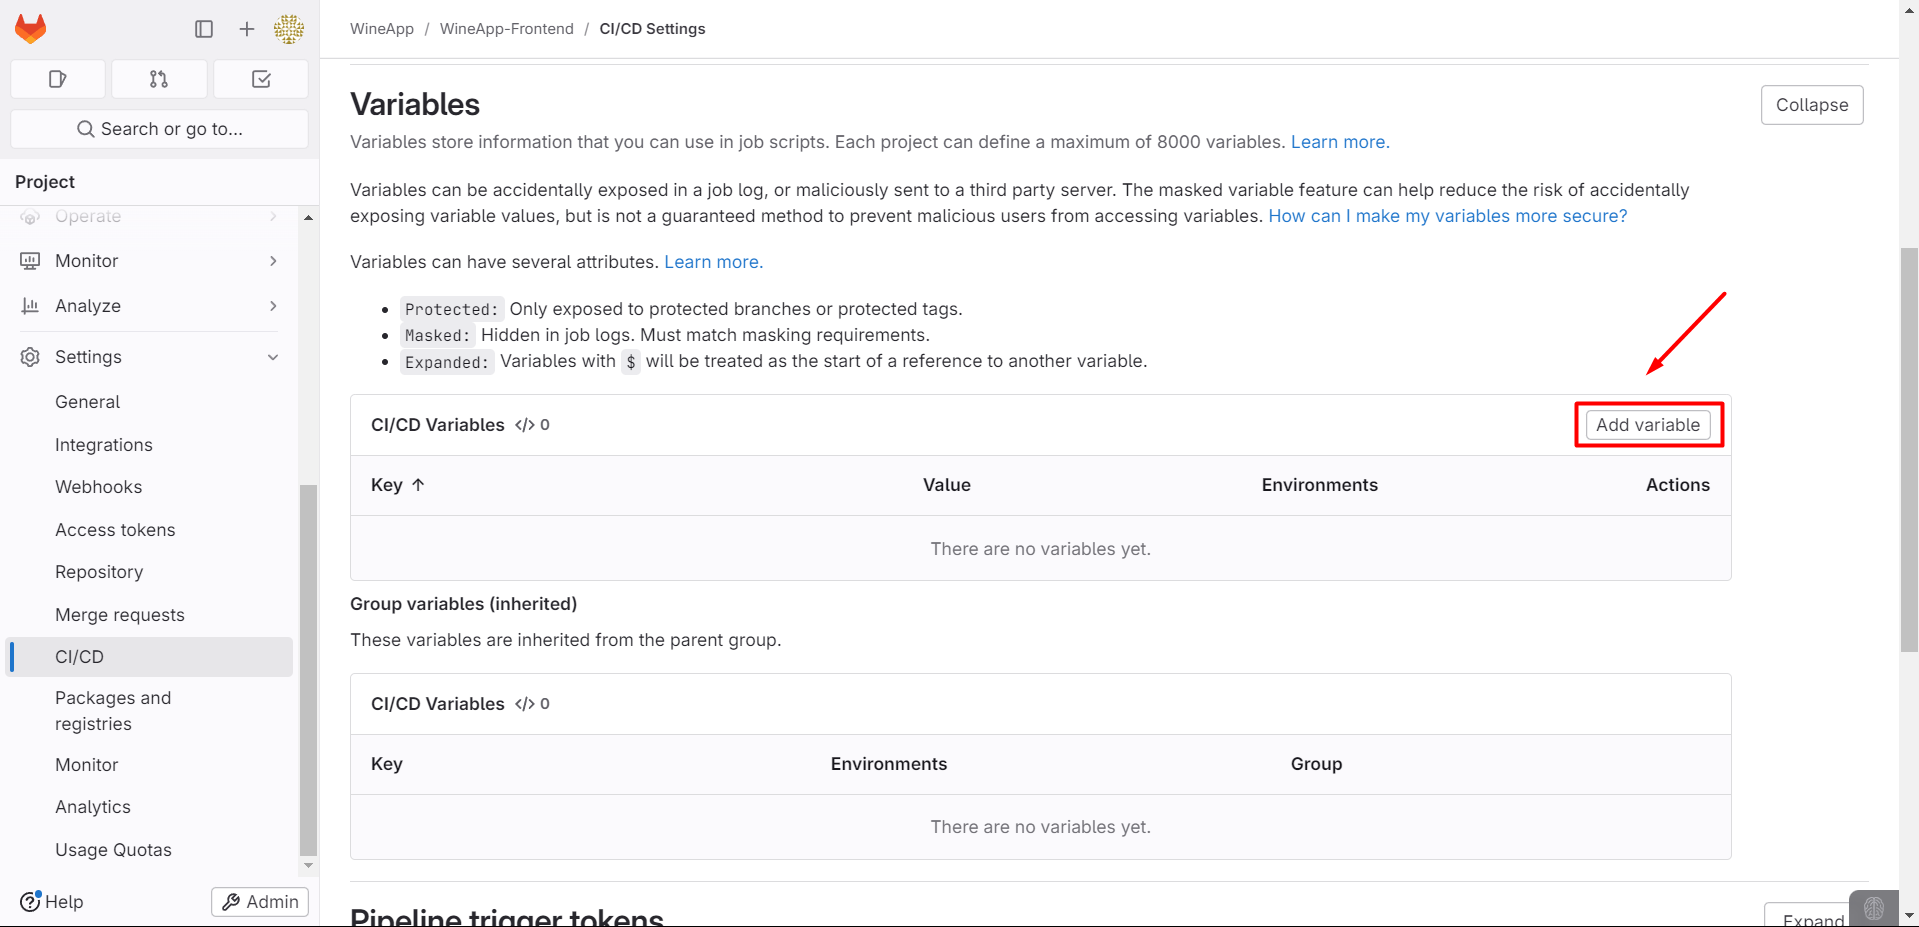
Proceed to add the necessary variables defined in the pipeline, except for GitLab’s predefined ones.

Protect variable: Variables will only run on protected branches and tags.
Expand variable reference: Any $ character in the variable’s value will be treated as a reference to another variable.
Example:
PROJECT_NAMEis set tomyapp.PORTUS_URLis set tohttps://registry.example.com/$PROJECT_NAME.
The variables have been added successfully.
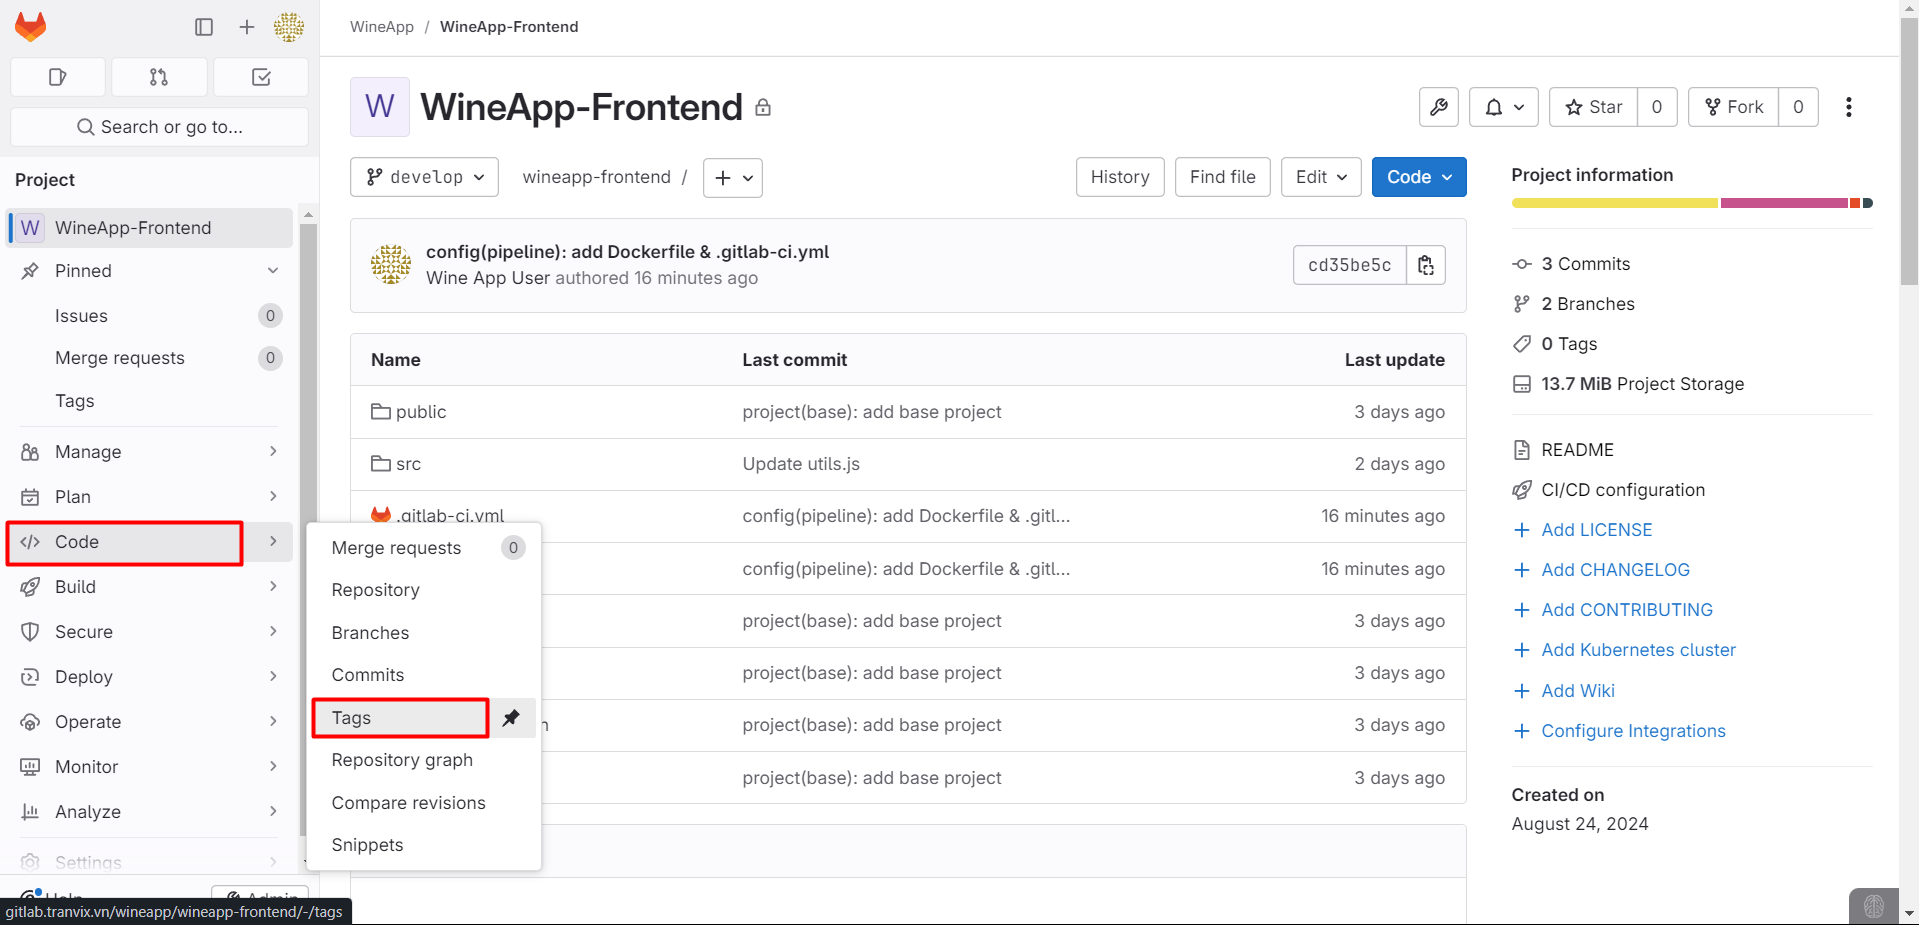
Initialize Pipeline
We will proceed to create a Tag:
Set the Tag name and make sure to select the correct Branch.
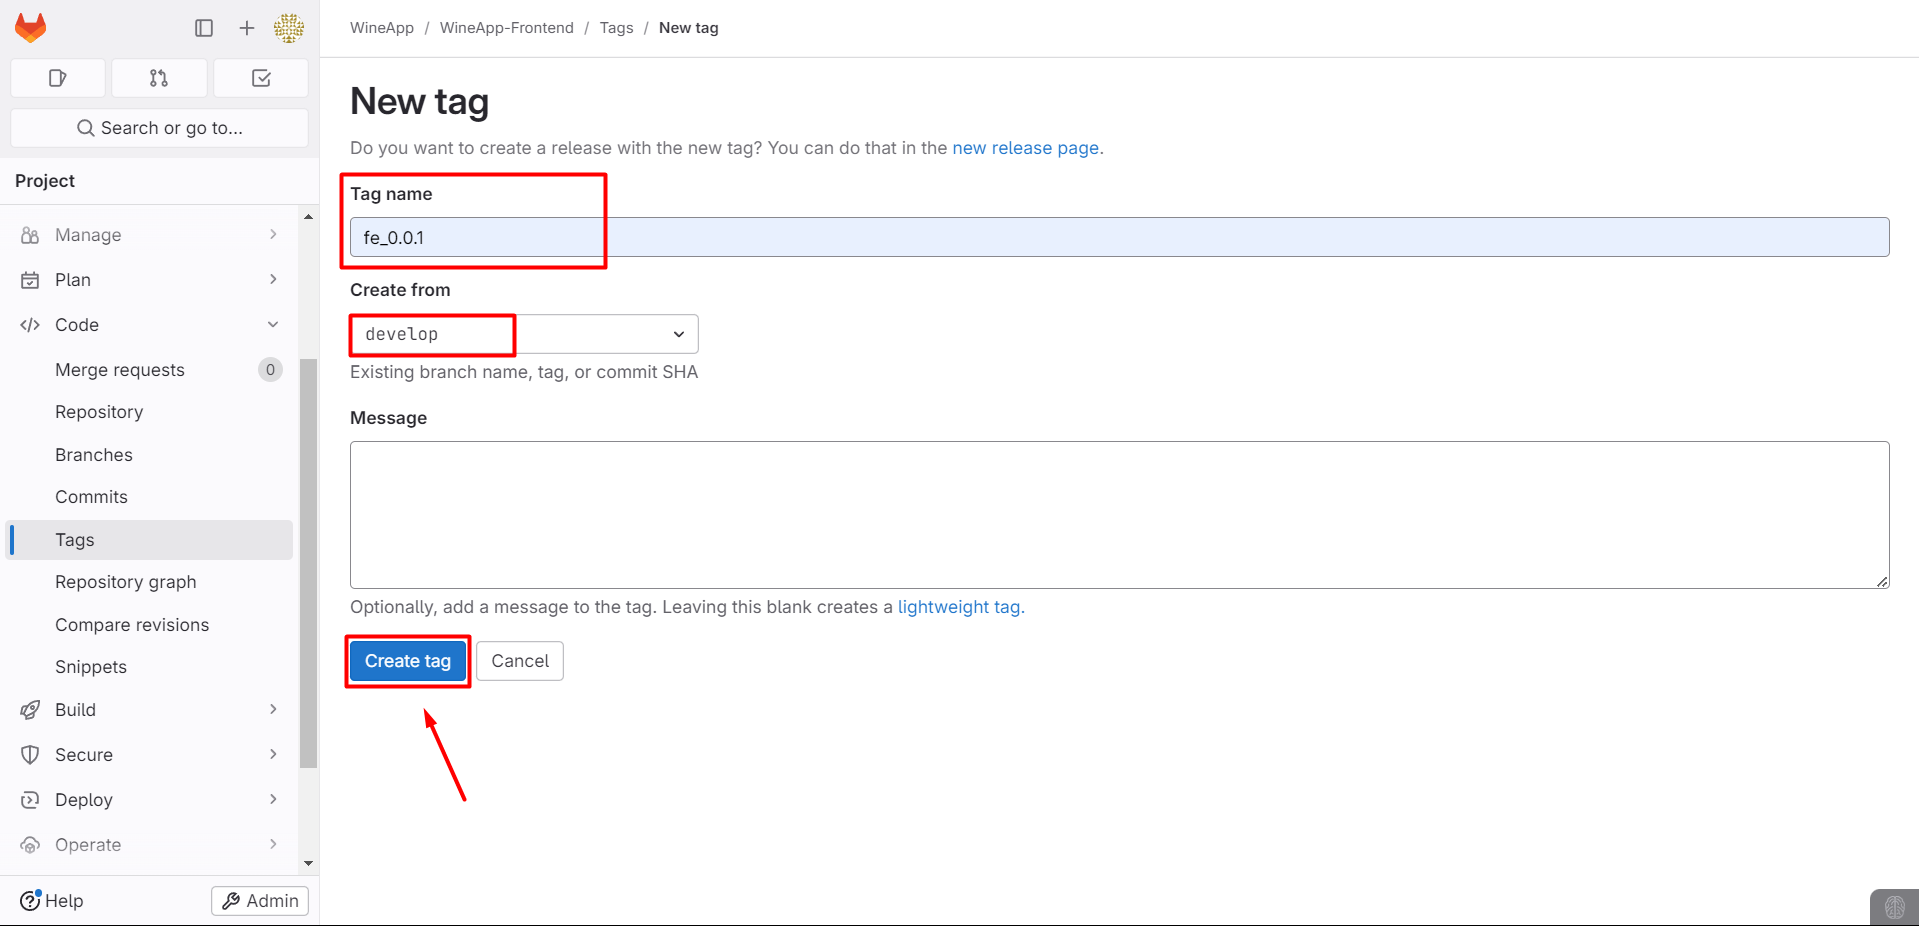
Once the Tag is created, the pipeline will start.
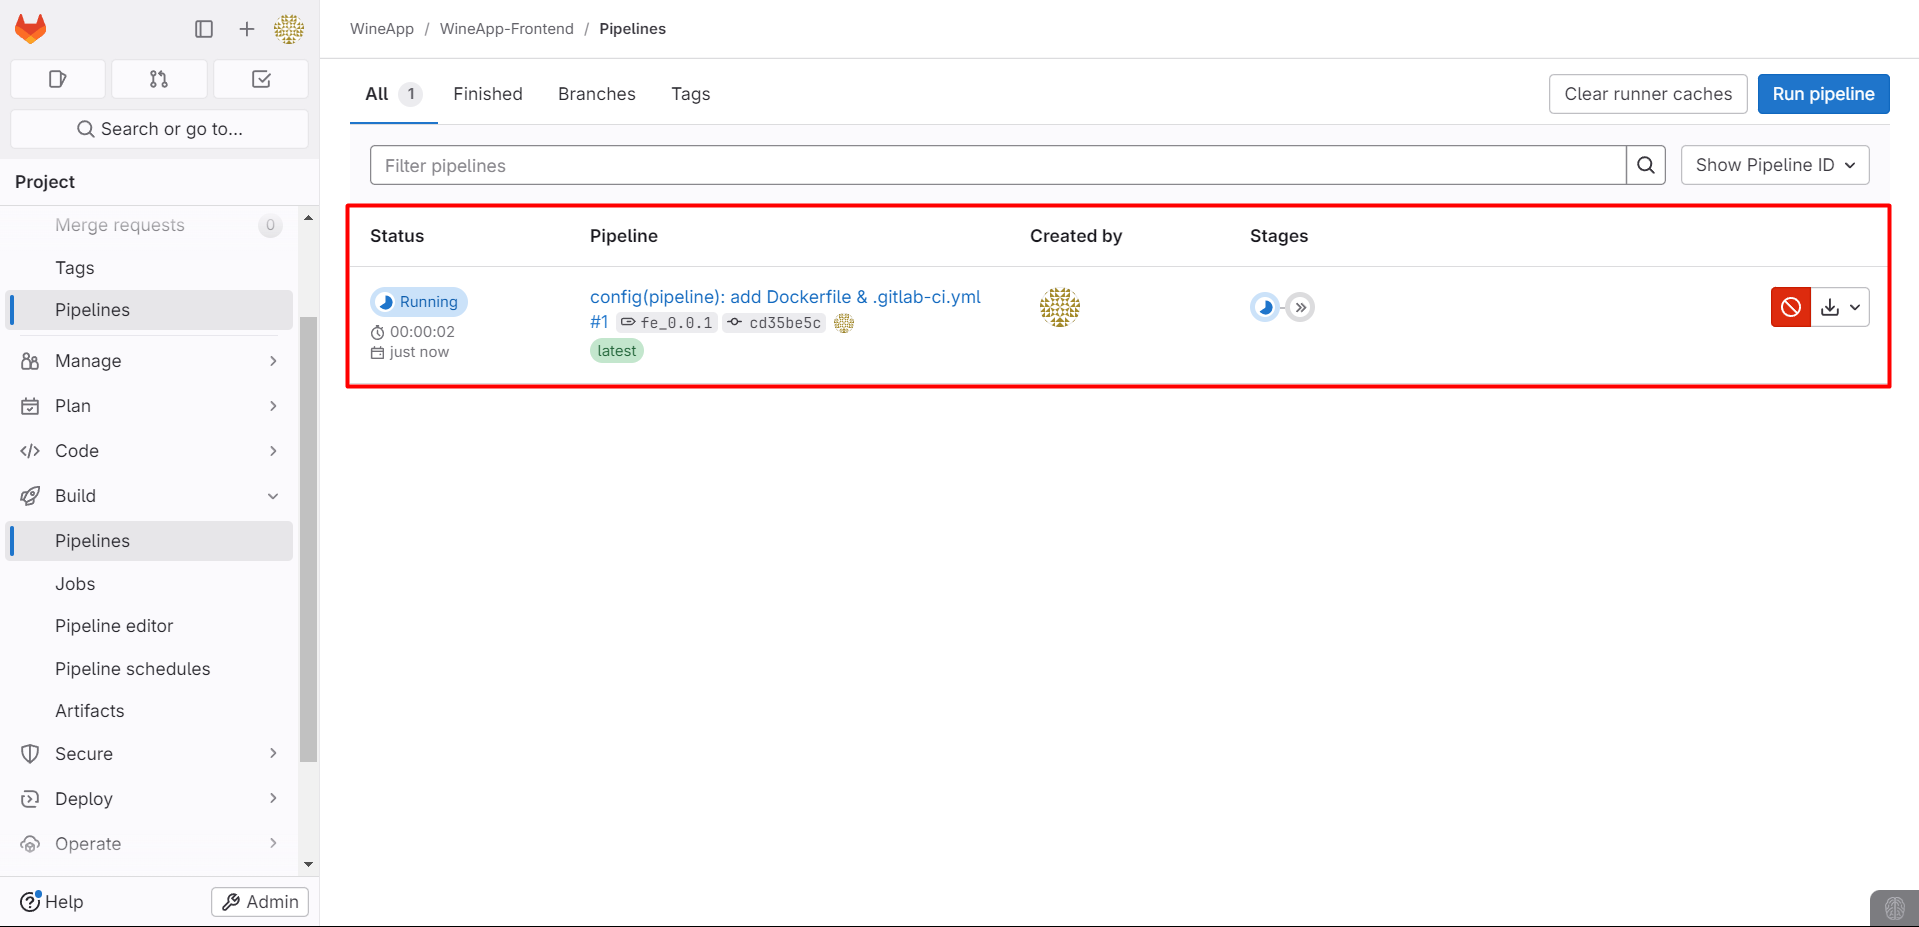

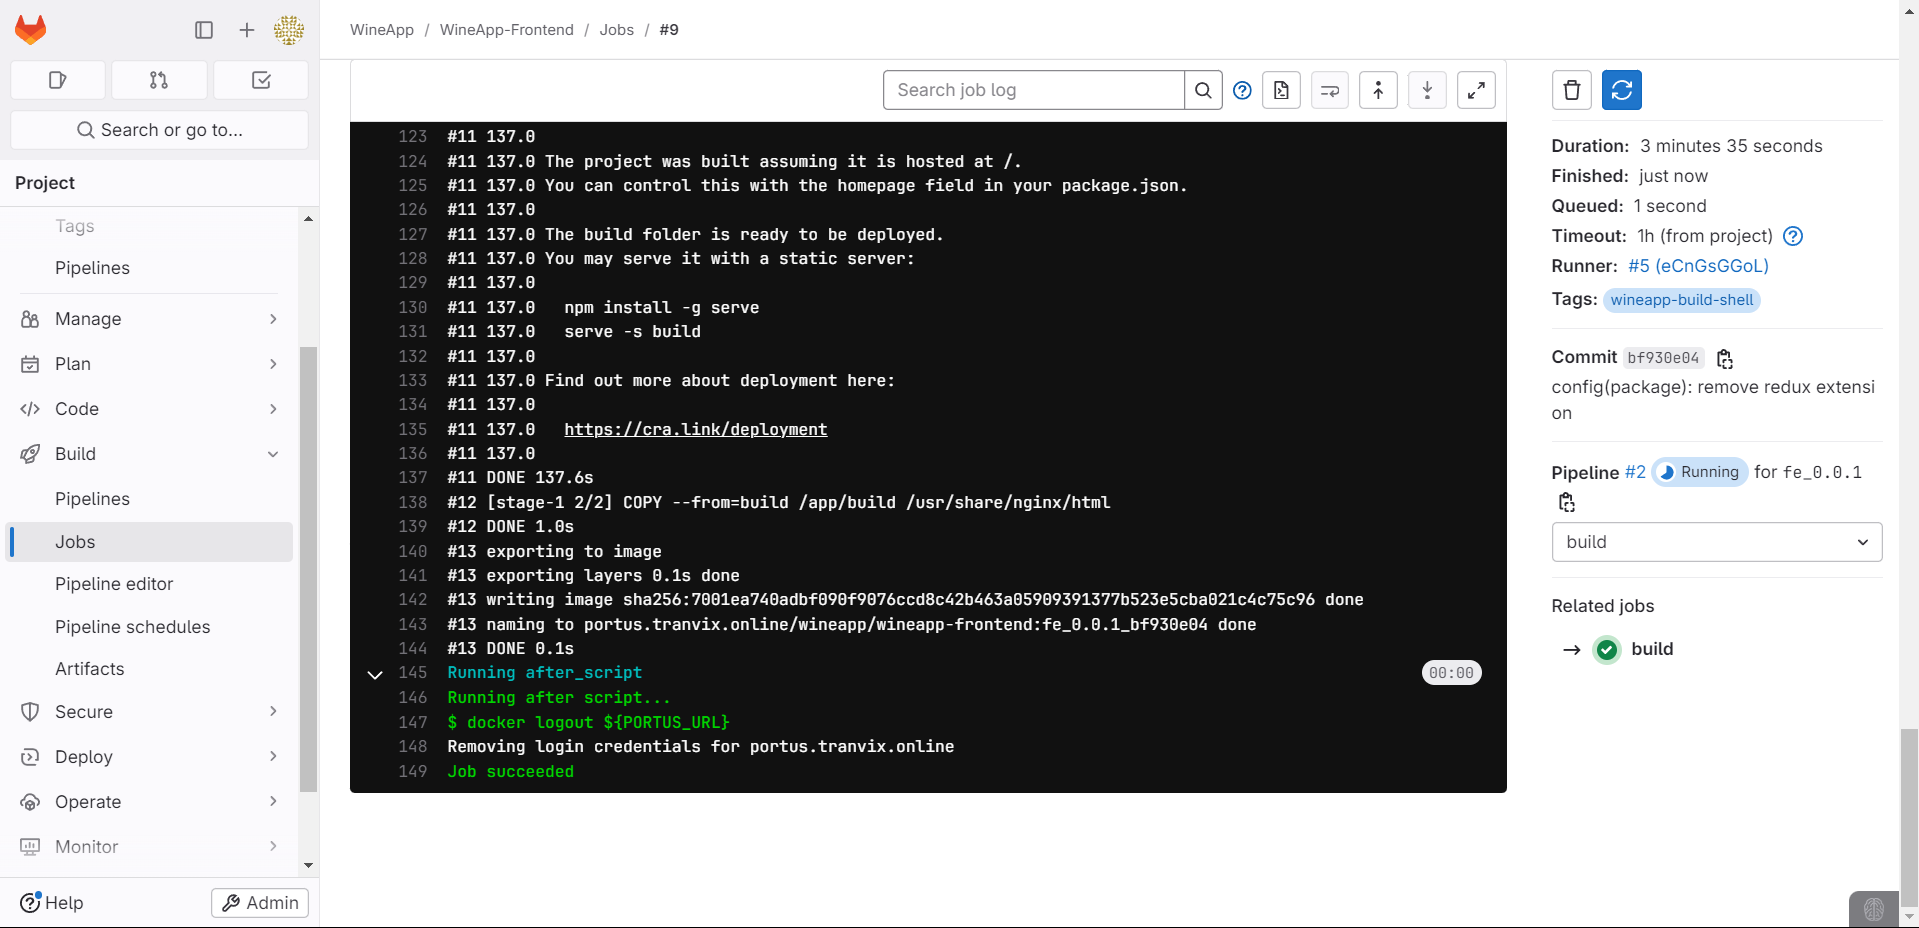
Job Build succeeded.
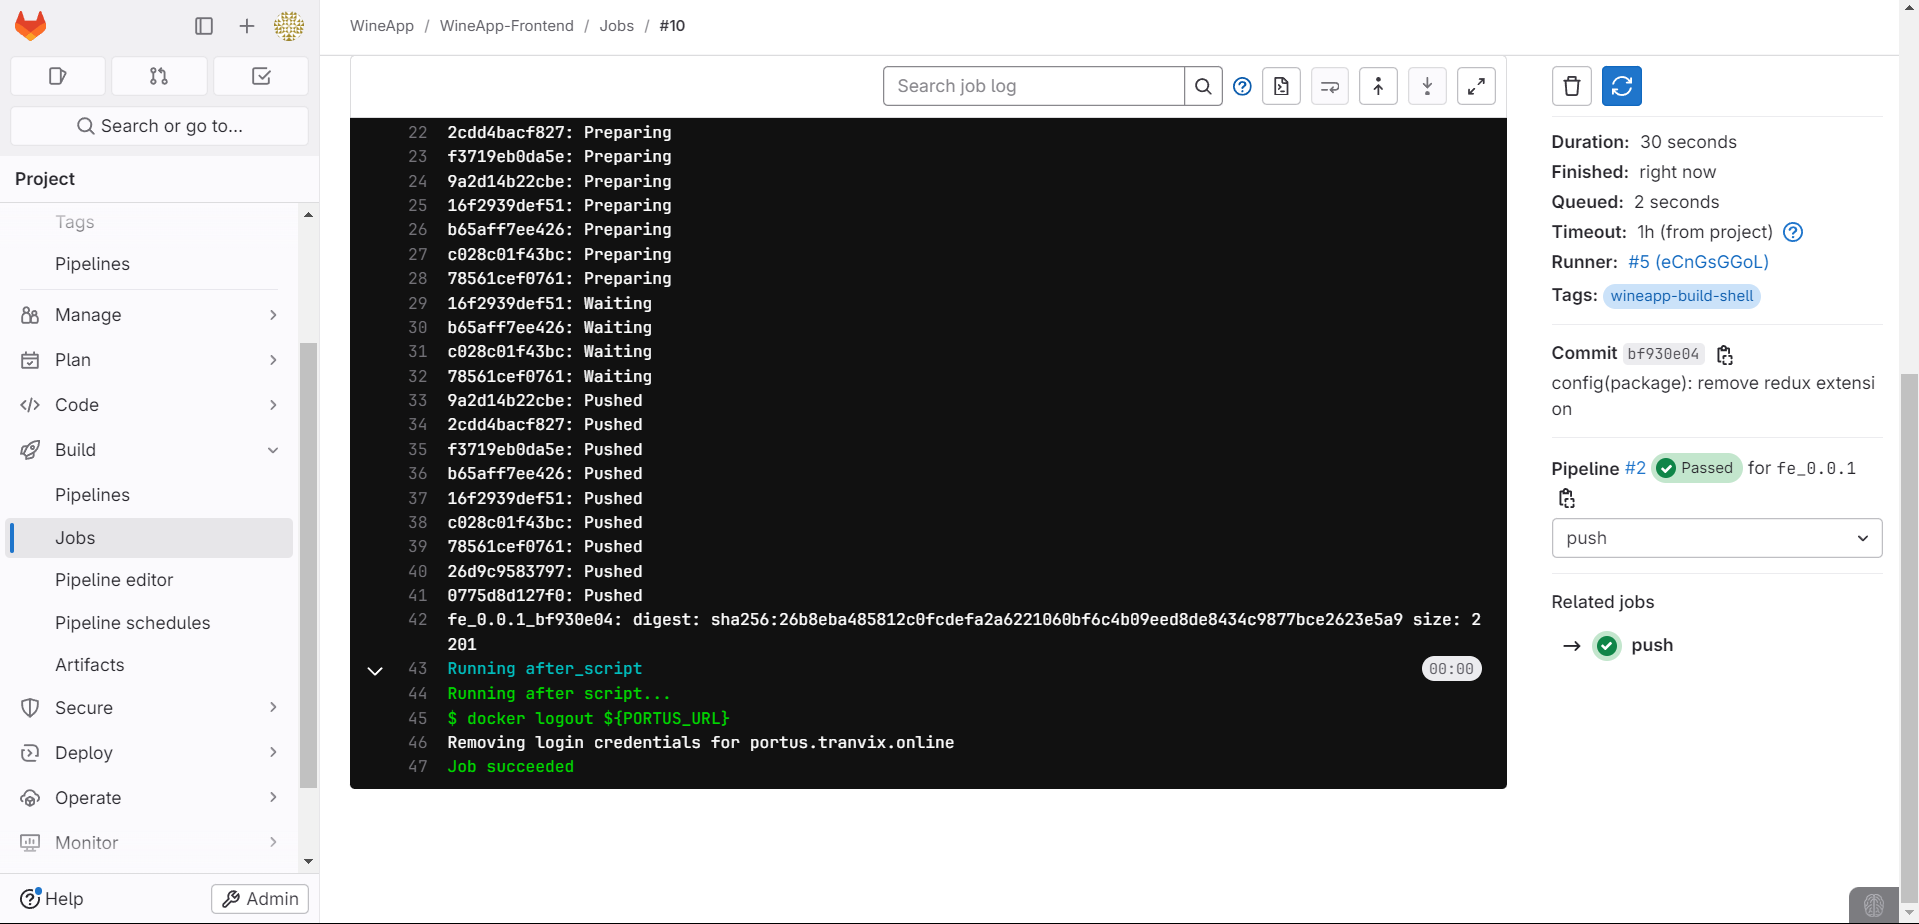
Job Push succeeded.
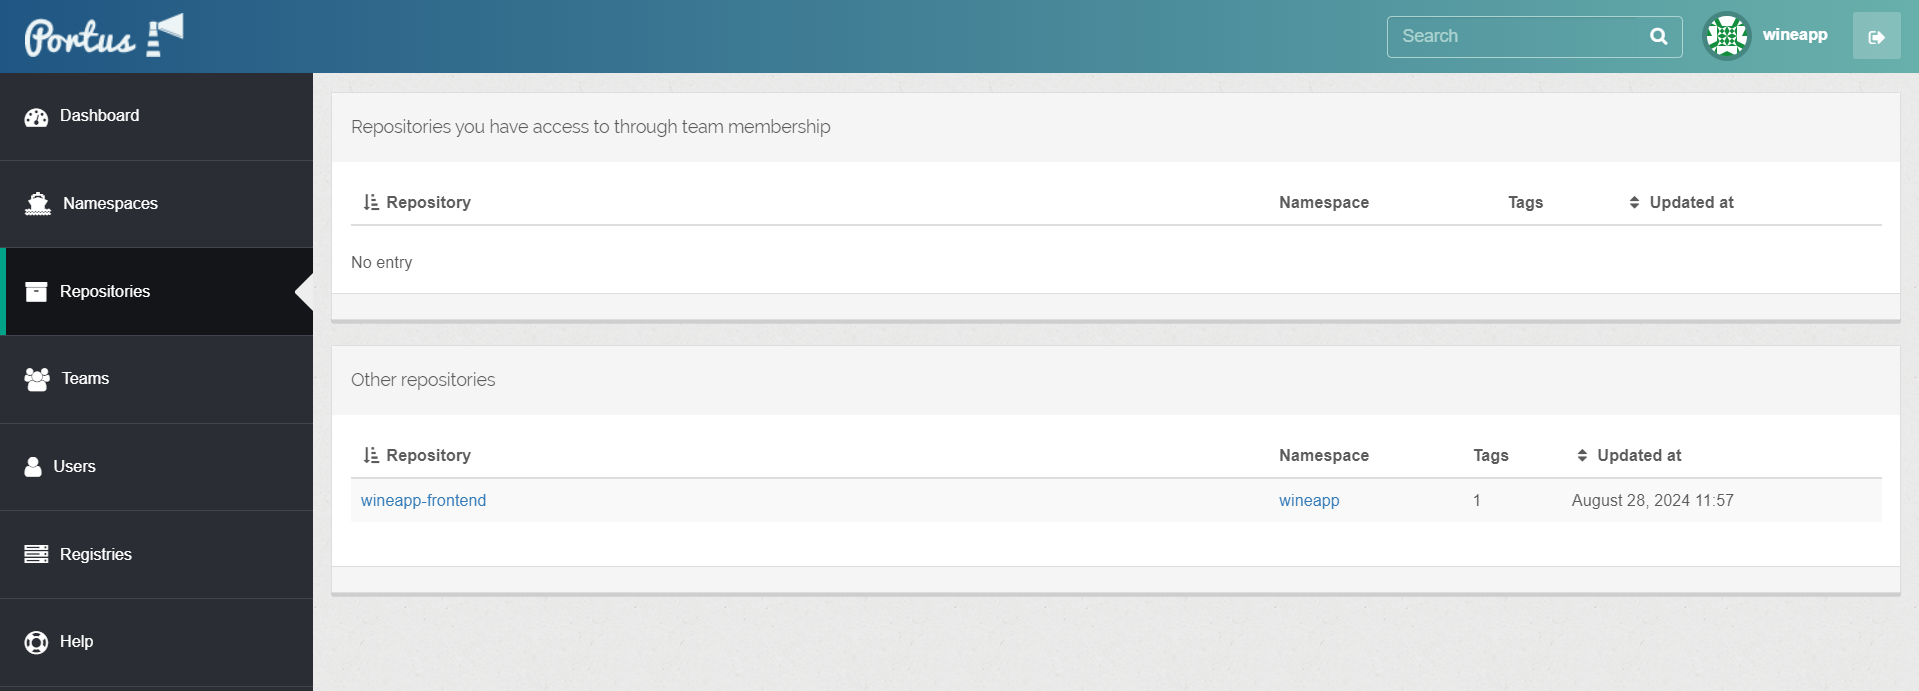
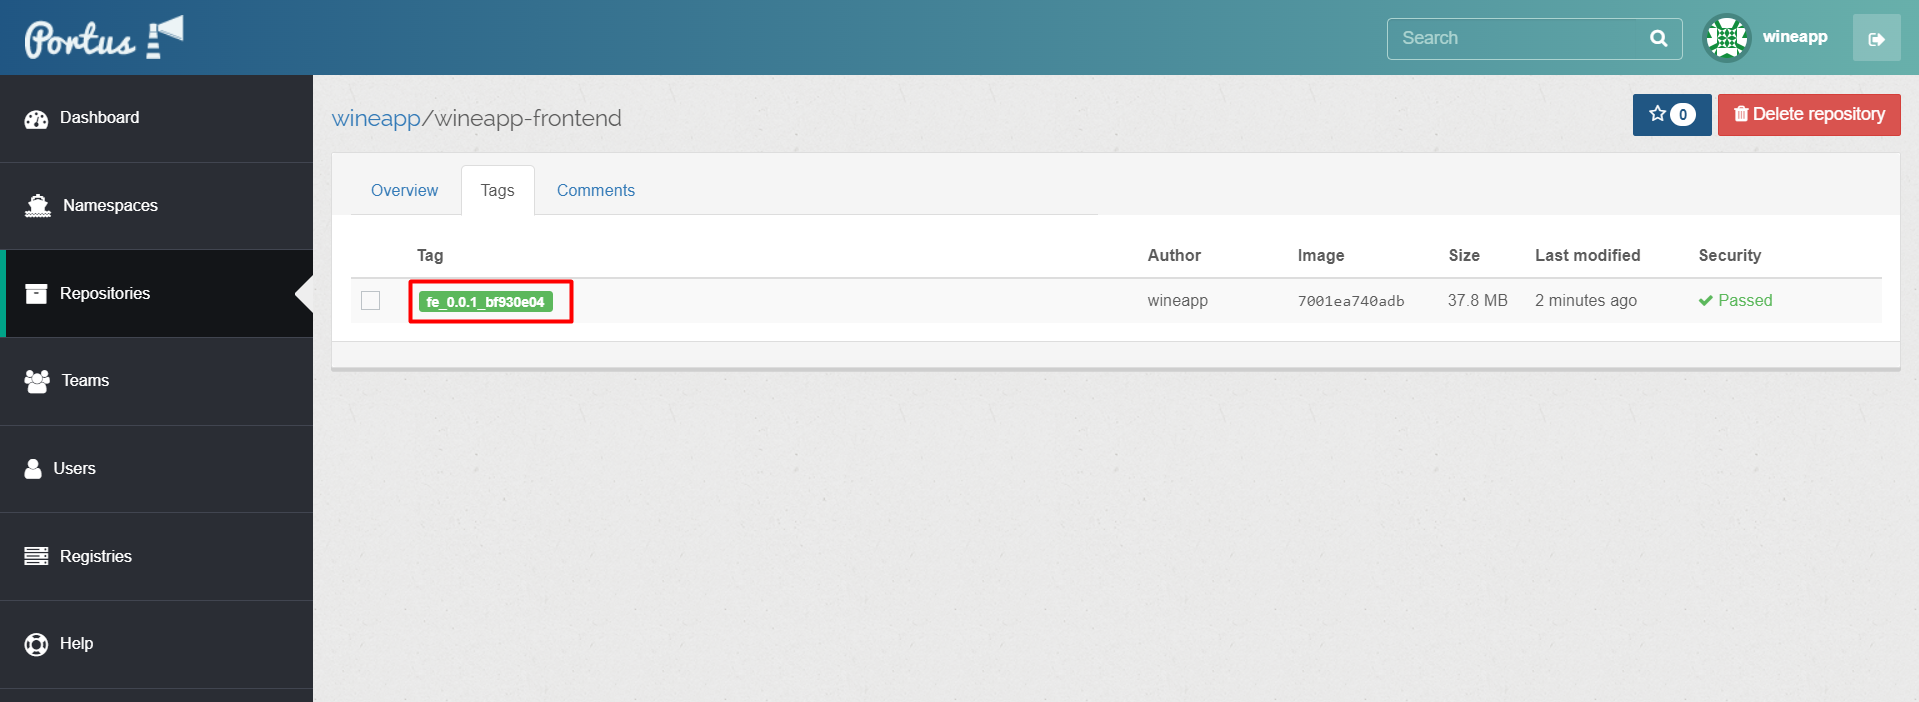
When accessing Portus, the repository has been pushed successfully.